Are you a 2D or 3D animator? If yes, then both jobs are time-consuming and require much effort. From the buyer’s perspective, it is also very costly, and they might not be able to afford it if they have a small budget.
However, there is an option for motion graphics. This option takes less time, is easy to create, and is ideal for low-budget clients. You can provide motion graphics services at low rates, help clients attract more customers, and upgrade your animation skills.
In this article, we will provide a step-by-step guide that will help you create motion graphics in a unique and easy way. By the end of this guide, you will be able to animate characters for motion graphics.
Conceptualization
Before anything else, the first and most important thing in animation is concept. You should not care about the character first; you should think about what message you want your character to convey. This will lay the foundational characteristics of your character.
You can easily create your characters when you have a clear concept of what you want to achieve. For the purpose of understanding, consider that you have a project for a school’s landing page. Now you can think that your character must be a happy school-going child.
After you’ve completely understood the task and have a clear concept of what you want to achieve from your character, note the main characteristics of your character. You can use the following questions to accomplish this task.
- Do you want your characters to tell a story or message?
- Do you want a 3D character or a 2D character?
- What will be the facial expressions of your characters?
- Were there any particular demands when your client hired your motion graphics services?
- Are there any specific personality traits?
If you have a message to deliver from your character or a more extended motion graphic project, then it is better to have a complete script for it. You should use other steps like storyboarding, illustration, voice recording, etc.
Another thing you should remember in your pre-production phase is the platform for your characters. Some motion graphics are for clients’ websites, and they give complete creative freedom to the 3D motion designers, but some are for social media, and you have to keep an eye on the supported formats, sizes, etc.
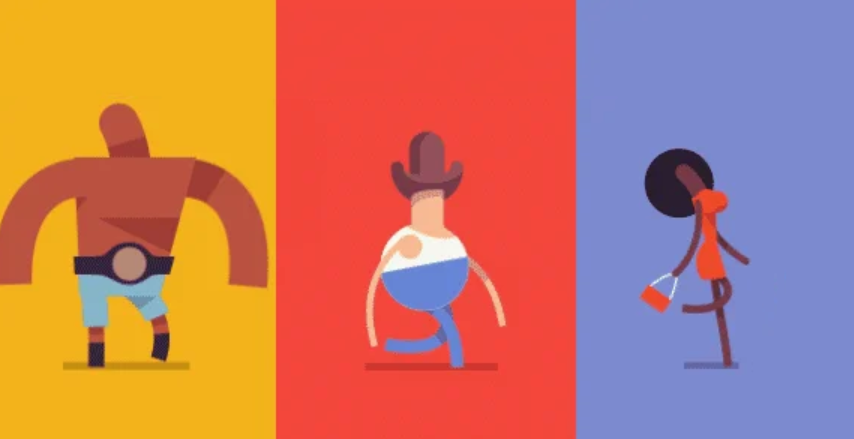
Designing Your Character
The next step on our list is designing your character. This step should only start when you have determined your character’s size, use, theme, mood, and other things.
Before starting your animation, you should keep in mind that your character should be attractive, relatable, and appeal to human emotion. To have the qualities mentioned above in your character, you should have a very detailed approach while designing your character.
Make sure that you don’t miss any tiny detail in your character. Small things like facial features, dressing, expressions, and gestures make your characters feel alive and much closer to life. Having these small things in your characters will help in building a more personal connection with the visitors.
Another thing that will help you create a significant uplift in your characters is the correct and efficient use of shadows, color palettes, and themes. Other secondary details like clothes and accessories worn by your character would help in creating a personal connection with the visitors and help in increasing the attractiveness of your character.
You can do character animation on various platforms. This is where you lay the foundation of your character and take it to perfection. It is okay if it consumes a lot of time and requires great effort. In the later steps, you will only be using the character and animating it. If you do this step correctly and excellently, you have achieved 50% of your goal.
Disintegrate Your Character
From this step, the actual animation starts. You must break your character into small, moving parts to ease the animation process. Disintegrate each component and add them in a separate layer. This will help you move these elements while moving forward in the animation.
Eyes, eyebrows, mouth, and cheeks are the most important facial features you must break down. You should also separate the head, upper body, lower body, legs, etc. The main aim should be to break your character as much as possible so you don’t have to face any difficulties while animating.
Another good approach is to name the folders and then separate the items. By this, we mean that if you have separated the eyes, lips, and cheeks, you should add them to a folder named face. This will allow you to sort things quickly whenever you need them.
Add Your Character To Your Animation Platform
Some software allows you to design your character and then animate them on the same platform. So, if you’re using such software, then you can skip this step. You should follow these guidelines if you are using different software for your design and animation needs. For example, Doratoon is a software that will allow you to create, animate, and add voice-overs to your characters.
Most professional designers use Adobe products and software. Adobe has different software for different needs. Here is how most animators use Adobe products for motion graphics. (It is optional to follow this approach; you are encouraged to follow and use the software you like.)
Adobe Illustrator: For creating the overall animation
Adobe Photoshop: For disintegrating the character into smaller bits and pieces.
Adobe After Effects: For rigging, animation, and adding special effects to your character.
One of the most essential things when exporting your file to a different software is that you should check if the format is supported. The file should be compatible with the second software you’re using. If you’re using only Adobe products, you can use their dynamic link option to transport your projects from one software to another efficiently.
Rigging
After you’ve imported your character to the second software, it is time to start rigging. With rigging, you could finally add motion and animation to your project.
Rigging creates a structure of moving points within your character’s body. There are many efficient ways of rigging, and you can think of rigging as creating a skeleton of your character. The main aim of rigging is to create a system that will help you to move body parts quickly.
The best tool for rigging is the anchor point tool. With the help of this tool, you can make the moving points in the right place, so when the body parts move, it will have a very natural look. Placing points at the center of gravity is a good approach, and it will help you a lot as well in making your character feel natural.
Thanks to today’s advanced technology, many software offer rigging options such as auto rigging. This will save you time for rigging or at least give you an idea that you can modify or correct according to your needs. Adobe Character Animator has some good rigging tools that industry experts widely use.
After rigging, don’t continue directly to the next step. Check your character movements and then proceed to the next step. See if the moves look natural. Try changing or adjusting the anchor points if your character looks a bit off in motion.
Create Character Movement
Character movements, as evident by its name, is the process of adding motion and movement to the characters. This is different from the above steps as it involves creating the keyframes that will breathe life into your character.
In simple words, keyframes are the frames in which your character is changing the position of its body parts, such as arms and legs, and running these keyframes one after another will create an illusion of your character’s movement.
It takes a lot of effort to master the skill of making the correct keyframes. Timelines are available in most software, enabling us to see and adjust the frames according to time. Experimenting and playing around with it will help you to learn much faster as compared to reading or watching videos related to it.
For example, if you wish to make your character walk, you can create a keyframe where the character’s legs are joined and then add frames where they get apart slowly to the farthest point and joined or aligned once again. You will see your character taking a step when you add them to the timeline. This can be reused whenever the character walks and every time the character takes a step.
You can also add other animations to make it look more realistic, like the character’s shoes displacing mud or its hair moving while walking. This is the most time-consuming and difficult step of the process, but the entire animation depends on this step. Do this step correctly to add life to beautiful characters.
Voice Over And Lip Syncing
Your characters need some sort of sound, so at the end, you should add appropriate sound or voice-over to your characters. If your character doesn’t say anything and only makes a gesture, you can only add background music to it.
If there is a script, you will also need a voice-over. After you’re done recording the audio, make sure that the lip-syncing is perfect, and for this part, you will have to jump back into the animation phase again. Also, try to find an appropriate voice-over artist because sometimes the audio sounds terrible and doesn’t match the character.
Handing Over The Project
After you finish your animation, export it and save it in the format your client asks for. You can hand over the file in any video format or GIF according to the requirement. Some clients ask for web-optimized video files, so you have to reduce the file size.
Also, ensure that the size, aspect ratios, and other factors are correct. The video doesn’t blur at any point, and the voice-over and further quality assurances. Your project is your brand’s reputation; if someone requests a 3D animation sample, you can send this project as your portfolio.
You can check the project by putting it on different platforms. Ensure that you keep an editable copy of the project. Sometimes, customers ask for changes after they’ve accepted the file. So, keep a copy of your work to tackle any situation like this. It is a standard policy of many companies not to delete data for a particular time.
Conclusion
Creating animated motion graphics is a time-consuming but amusing job for passionate individuals. If you have the right approach and know how to use the right tools, it will be straightforward for you to offer motion graphics services or get a job in a motion graphics company.
If you want to learn more about motion graphics services or want to hire an expert service, contact Prolific Studio. They are a talented 2D and 3D animation service provider who will take care of all your animation needs under a single roof. So, if you want to hire the best animation services in the USA, contact Prolific Studios now!