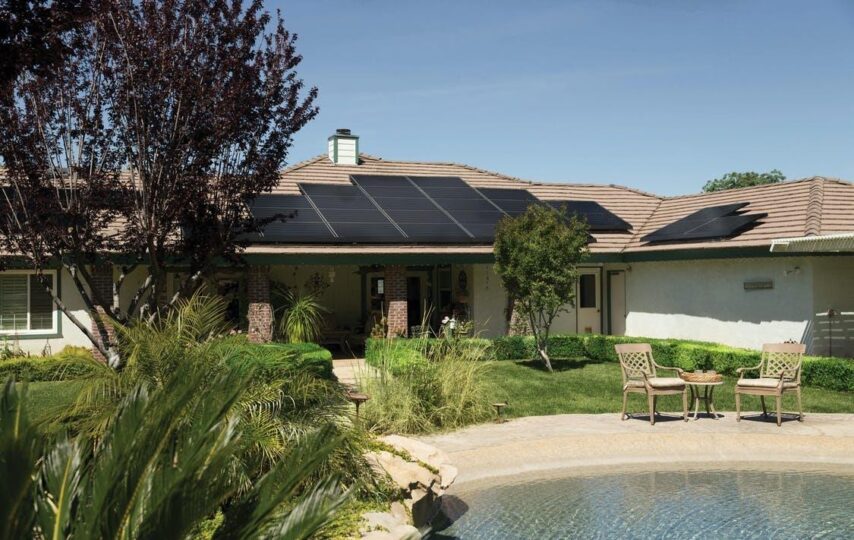
Roof solar panels can bring a severe financial boon to any homeowner and the environment too!
Still, the upfront cost can be a bit much for some people. Are solar panels worth it? If you ask us, yes!
Still, installing solar panels can be intimidating, especially if you’ve never done it before. Is it expensive? Where do you start?
Read on, and we’ll answer your solar panel questions and more!
Choosing the Right Location
To choose the right location for roof-mounted solar panels, evaluate the roof to ensure it is in good condition and can sustain the board’s weight. Ceilings should be flat, not sloped. Avoid any obstructions, old vents, and skylights. Then look at the compass direction and angle of the top.
Ideally, unchecked sunlight should be available for the solar panels all day, so when possible, choose a location facing south to maximize sun exposure. Since solar panel installation styles vary, check with an expert beforehand.
Finally, the distance between solar panels should also be taken into consideration. Professional solar installers recommend spacing them 2 – 4 inches apart and between 6 and 10 inches from the edges.
Type of Roofing Material
However, the type of roofing material used will determine the best way to mount the panels and how much extra support may need to be used to secure them. Metal roofs should be avoided as the panels can’t be mounted directly to them. Tiles, shakes, and shingles can be used, but mounting systems must be constructed using lumber and flashing for security.
The Size of the Roof
If the roof is too small, there will not be enough room to securely mount the panels, and the area of the roof that they’re being mounted on needs to withstand the weight of the solar panels. The estimated size of the solar panels for an average rooftop system is 4ft x 2ft, and the area of the roof they can be mounted onto should be wider than the actual size of the panels to ensure they are correctly mounted.
Weather Conditions
Roof solar mountings are typically designed to mount flush with the roof at an optimal angle for maximum solar exposure. In areas with high winds, hardware must withstand the force of wind and hail. Adhesive, screws, and non-penetrative mounts can secure solar panels to the roof.
To prevent water from seeping beneath the solar panels and into the home, flashing or sealant should be used to bridge any gaps left by panels or mounts. Finally, rails or brackets must be used in snowy climates to keep the panels above the snow line.
Mount Installation
Solar panels are mounted to the roof with mount installation. It is essential to install the mount securely so that it will not be affected by adverse weather conditions or shifting roof structures.
Install the Racking Rails
Our racking rails are essential to correctly installing a solar panel system. The rails are specially designed for solar PV applications and are available in aluminum or steel to fit your roof type and weight requirements best. The racking rails are attached to the roof using lag bolts, screws, and plates.
When mounting the rails, all lag bolts must sit tight and flush with the roof to ensure a secure and stable bond. The solar panels can be attached after the racking rails are locked and aligned. The rails will hold the meetings optimally for power efficiency when exposed to sunlight, maximizing your energy output.
Mount the Panels
The solar panels should be attached to the mounts with bolts and silicone sealant. It is essential to ensure the solar panels are securely fastened to the mountains and that the bolts are tight. It is also necessary to ensure that the panels are not overhanging the roof in any way, as this could create drag and cause damage to the shingles.
For best performance, the solar panel mounts should be located in an area that receives direct sunlight for at least seven hours per day to maximize the efficiency of the solar panels.
Battery Installation
They are mounted onto the roof using racks, which generally fit around the shingles. Regarding battery installation, the batteries are usually mounted underneath or alongside the panels. Depending on the type of system, the batteries may be plugged in with cables directly into the back of the solar panels or connected to an inverter.
The batteries must also be mounted to stay in place during high winds or extreme weather conditions. The batteries are usually tied down securely with a locking bracket or similar to keep them secure.
Doing the Wiring
Depending on the system type, wiring may also be required for attaching the solar panels or other system components and to complete the connection of the PV system to the power grid. Do-it-yourself or DIY installers may be able to wire up the solar panels from the roof, or they may require a licensed electrician to do the work.
The electrician will inspect the array’s connections and determine the requirements for wiring to connect the solar panels, inverter, and combiner box. The necessary wiring and work must be done according to the Rules and Regulations of Electrical Safety. Therefore, it is essential to properly install and wire up solar panels according to these rules and regulations.
Once the panels are mounted, the electrical wiring must be connected, including an inverter, charge controller, batteries, breaker, and isolation switches. To ensure optimum performance and promote sustainable energy, it is essential to read and follow all manufacturer’s instructions and to consult a professional if necessary.
Performing a Test Run
By performing a test run, the installer will be confident that the system is secure, safe, and ready to generate energy. This test all depends on the type of panel.
Still, it typically involves checking for leaks, mounting the panel onto the roof and running it through several cycles, monitoring the power, and making necessary adjustments. Once the test is complete, you can be sure it’s performing optimally and go ahead with the permanent installation.
Understanding How to Install Roof Solar Panels
Roof solar panels can provide a sustainable, clean, cost-effective energy solution. For best results and long-term reliability, seek a qualified installer to install the urging system correctly. Discover the possibilities of a solar roof today and start living greener!
To learn more helpful tips, be sure to visit our site today!