Are you sick of having critical video conferences on Zoom fail due to Error Code 2207? It’s annoying, isn’t it? But don’t worry! In this post, we’ll look at some of the best fixes for this problem. So you can quickly resume having smooth Zoom meetings. We can help you with anything from changing audio settings to upgrading drivers to resolving issues with other programmes. So let’s get started with the interactive instruction & learn how to fix Error Code 2207 Zoom. So that you can have trouble-free virtual conversations.
What is Error Code 2207 on Zoom?
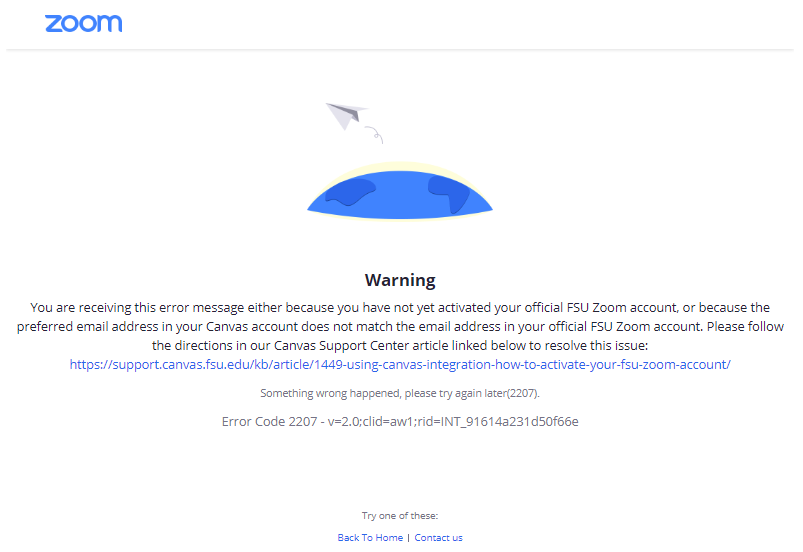
Image credit – FSU
When utilizing the Zoom video conferencing platform, Error Code 2207 Zoom often indicates an issue with audio settings or equipment. When choosing or setting up the proper audio equipment, such as speakers & microphones, this error may occur. Additionally, it could be brought on by out-of-date or incompatible audio drivers. It might be the issues with other audio-improving programmes, or Zoom application bugs. Troubleshooting procedures including checking & modifying audio settings, upgrading drivers. Also restarting audio services, &, if required, reinstalling Zoom are often needed to fix Error Code 2207.
7 Ways to Fix the Error Code 2207 On Zoom
Users often get Zoom Error Code 2207 while utilizing the video-conferencing application. It often means that there is an issue with the audio settings or equipment. Here are seven actions you may do to resolve Zoom Error Code 2207:
1. Verify audio equipment settings
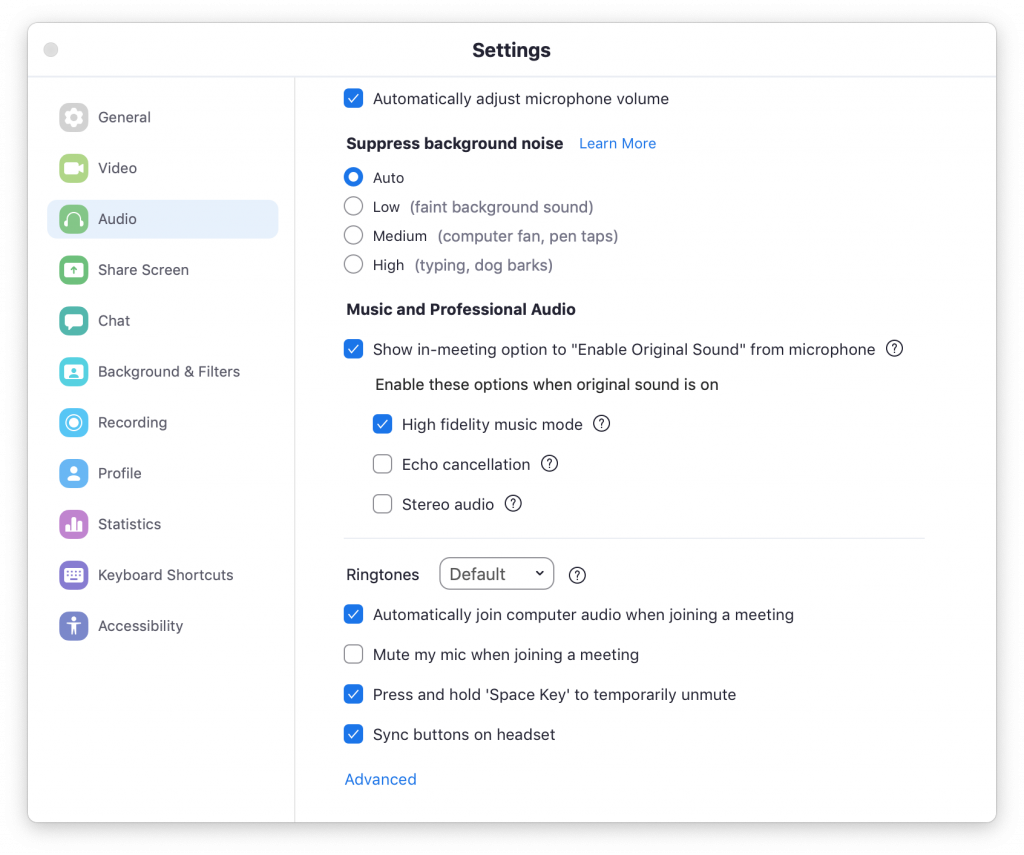
Image credit – Sound cellar
a. Start your computer’s Zoom app.
b. Select the “Settings” icon in the Zoom window’s upper right corner.
c. Select the “Audio” option from the Settings menu.
d. From the dropdown menu in the “Speaker” section, choose the appropriate audio device.
e. Select the suitable microphone device from the list under the “Microphone” section.
f. Test the chosen devices in Zoom to make sure they are operating properly.
2. Find out who made your computer or audio equipment.
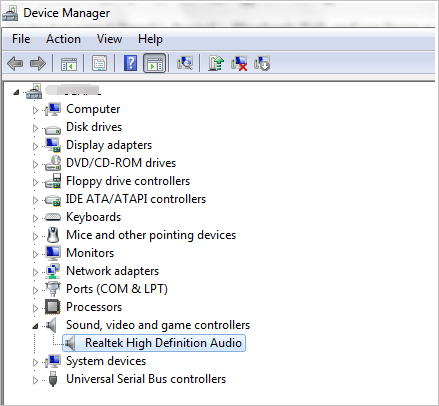
Image credit – driver finder
a. Update your audio drivers.
b. Check out the product’s website.
c. A “Support” or “Downloads” section should be found.
d. Find the most recent audio drivers that are compatible with your system online.
e. Download the necessary drivers & adhere to the installation guidelines.
f. To implement the modifications, restart your computer.
3. Restart the audio services
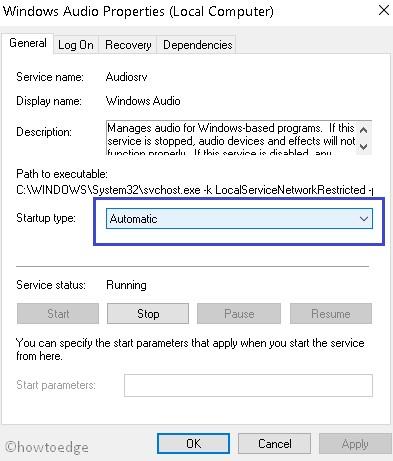
Image credit – How to edge
a. Press Windows key + R to bring up the Run dialogue box on your keyboard.
b. In the Run dialogue box, type “services.msc” & press Enter.
c. A window titled Services will appear.
d. Scroll down to find “Windows Audio,” “Windows Audio Endpoint Builder,” & “Plug & Play.”
e. From the context menu, choose “Restart” when you right-click on any of these services.
f. Exit the Services window, then restart your machine.
4. Test the audio equipment
a. Unplug any external audio devices from your PC.
b. Play audio from other programmes or websites to test your speakers.
c. Use your microphone with another programme or gadget to test it out.
d. If your audio equipment isn’t working correctly, think about fixing or replacing it.
5. Turn off any further audio-enhancing programmes
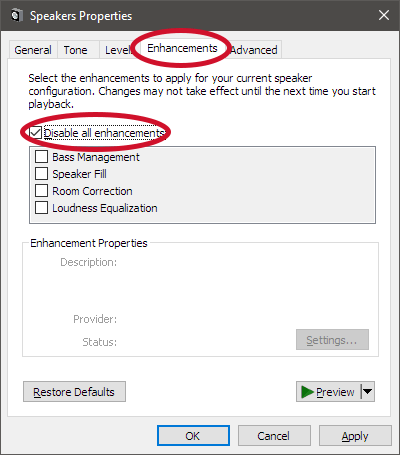
Image credit – PTE Study
a. Start your computer’s Control Panel.
b. Select “Programmes” or “Programmes & Features.”
c. Search your system for any third-party audio-improving software that may have been installed.
d. After selecting the programme, choose the option to deactivate or remove it.
e. To implement the changes, restart your computer.
6. Clear Zoom Cache
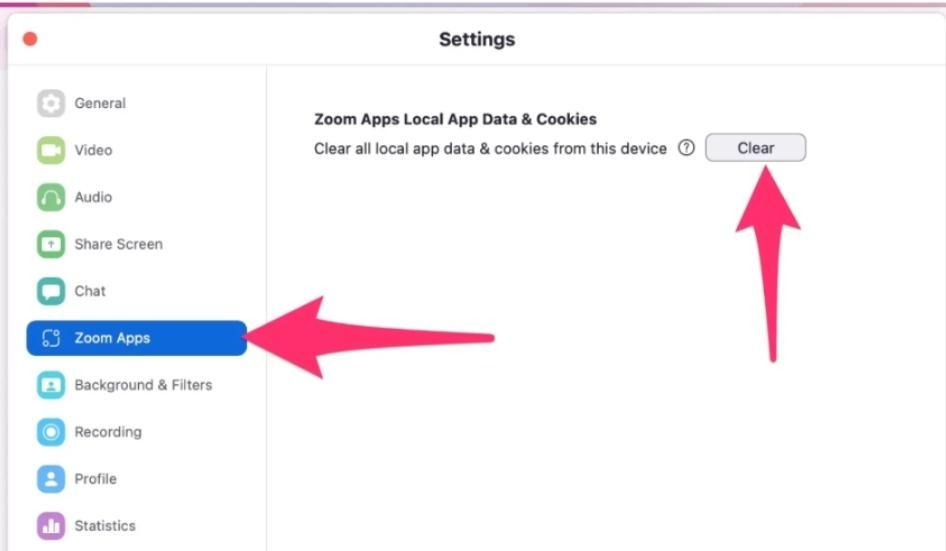
Image credit – nearity
a. Launch the Zoom desktop client on your PC to clear the cache for Zoom.
b. Select your initials or profile photo in the upper right corner.
c. Choose “Settings” from the drop-down menu.
d. Select the “Advanced” option in the Settings box.
e. Select “Clean Data” from the menu.
f. Approve the action & wait for the procedure to finish.
b. Restart the Zoom application & see whether the issue still exists.
7. Install Zoom again
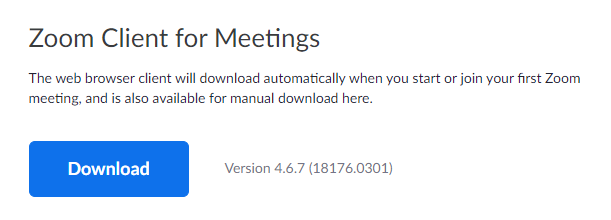
Image credit – CCA portal
a. Remove the Zoom programme from your computer.
b. Download the most recent version of the app from the Zoom website (https://zoom.us).
c. Launch the installer & adhere to the prompts on the screen to install Zoom.
d. After the installation is finished, restart your computer.
e. Start Zoom & verify that Zoom Error Code 2207 has been fixed.
After completing these steps, if the problem persists, you could try contacting Zoom’s technical support for more guidance.
5 Tricks to Ensure a Smooth & Error Free Experience on Zoom
Here are five useful tips to keep mistakes at bay & guarantee a seamless Zoom experience:
1. Continue to update Zoom: By regularly upgrading Zoom, you can be confident that you are using the most recent bug fixes & enhancements. Updates for Zoom are released to fix known problems & improve functionality. To keep your Zoom app up to date, enable automatic updates or manually check for updates.
2. Test Audio & Video Before Meetings: Take time to test your audio & video settings in Zoom before attending a crucial meeting or event. To make sure your devices are working correctly. Use the “Test Speaker & Microphone” & “Test Video” options in the Zoom settings. This enables you to take care of any prospective problems in advance.
3. Reliable Internet Connection: For a seamless Zoom experience, you must have a trustworthy internet connection. If at all feasible, connect your computer directly to the router using an Ethernet cable for a more dependable connection. Make sure you have a good connection & limit interference from other devices if you’re using Wi-Fi. Avoid using your network for b&width-intensive tasks during crucial Zoom sessions.
4. Exit Unnecessary Programmes: Running many programmes at once will tax your computer’s resources & perhaps result in Zoom problems. Close any superfluous programmes & background tasks to free up system resources & improve Zoom’s performance.
5. Restart Your Computer: A simple restart of your computer might assist in resolving any recurring Zoom errors or problems. Restarting cleans up temporary files, renews system operations, & often fixes small issues. This basic step in troubleshooting may help you save time & stress.
By employing these tips, you may reduce the possibility of running into issues. While using Zoom & guarantee a smoother & more effective video conference experience.
Frequently Asked Questions
1. What does Zoom’s Error Code 2207 mean?
During a video conference, Error Code 2207 Zoom often indicates a problem with audio settings or equipment. It implies an issue with choosing the appropriate audio equipment, including speakers & microphones.
2. How can I repair Zoom Error Code 2207?
You may attempt a number of methods to resolve Error Code 2207 on Zoom. Including reviewing the audio device settings, upgrading the audio drivers, restarting the audio services. Also testing the audio devices, turning off incompatible applications, emptying the Zoom cache, or reinstalling the Zoom programme.
3. What does Error Code 2207 mean when I use Zoom?
Zoom error code 2207 might appear for a number of reasons. Including faulty audio device settings, obsolete or incompatible audio drivers. The problems with other audio-enhancement programmes, or Zoom application bugs.
4. Is a computer restart necessary to resolve Zoom Error Code 2207?
The suggested first step in troubleshooting Error Code 2207 on Zoom is to restart your computer. It assists in resetting system processes, deleting temporary files. Often fixes little issues that might be the source of the problem.
5. What should I do if, after attempting the offered fixes, Error Code 2207 on Zoom still occurs?
After trying the suggested fixes for Error Code 2207, it is advised to contact Zoom’s technical support for more guidance. Based on the setup of your system, their staff may provide more detailed advice & assist in solving the problem.
Conclusion
Therefore, solving Error Code 2207 Zoom doesn’t have to be a difficult chore. You can easily diagnose & resolve the problem by following the instructions provided in this article. Before crucial meetings, don’t forget to check your audio device settings, update drivers, & test your audio equipment. Contact Zoom’s technical support for more help if everything else fails. With these options at your disposal, you can say goodbye to Error Code 2207. Take advantage of continuous Zoom meetings, promoting fluid online communication. Enjoy your conference!