Several electrical components combine to make the PCBs. The manufacturers keep every component efficiently functioning to guarantee PCBs qualitative performance. So, when the capacitors in the PCB malfunction, the PCB manufacturers desolder it to replace it with the functioning alternative.
When the soldered capacitors on the PCB don’t function properly, the manufacturers desolder it to save the PCB from severe damage. This article discusses the types, essential steps, and tricks to desolder PCB Capacitors professionally in high volume PCB electronics manufacturing.
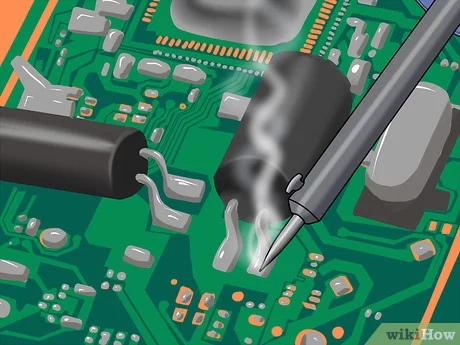
PCB capacitor Desoldering
- Steps to desolder SMD Capacitor
- Plug in the soldering iron and heat it at 370 degrees for at least 15 minutes.
- Place the iron on the circuit board holder where the components that require desoldering appear in the upright positions.
- Circuit board and its holder should contain no moisture.
- Soften the soldering joins by holding the circuit board with the tweezers and touching the iron tip to the joints.
- When the joints soften, displace the capacitor to cleanse the flux on the board. You can easily remove it with the soldering braid.
- Steps to desolder Regular Capacitor
- It begins with a similar process involving the desoldering of the SMD capacitor. However, it requires directing the components that need desoldering downwards.
- Ensure that you have removed the flux entirely and there is no melted residue.
- Place the PCB with the components cladding upwards.
- Remove the capacitor with the tweezers once you have removed the solder flux from the joints.
- Wipe the remaining flux with a rag and cleaning alcohol. Let the PCB dry before operating.
Tips to consider before desoldering
- Select a Soldering iron
Select a suitable soldering iron or mask before beginning the process. You can choose the one you like from multiple available options or take the assistance of the professionals. Choose the iron that heats quickly to reduce the waiting time. Moreover, the irons with temperature control and flexible wires ensure a long life of the irons.
- Choose a suitable circuit board holder
The Circuit board holds the parts together by providing the components an interruptible connection. However, capacitors and resistors don’t require an active power connection. Yet, it is significant to go for the circuit board that is apt for both the active and passive components. The suitable circuit board has drilled holes to adjust other components and wires at their specified places. It constitutes an essential part of the PCB and is vital for desoldering capacitors. You can design the circuit board at home or purchase one, but ensure the required features.
- Apply more solder to keep it melted for long
The solder dries out quickly, making it difficult to desolder the components. It becomes challenging and quite irritating also. Yet, you can save yourself from this irritation by using more solder than usual. It will remain in its liquid form while you examine the electrical components on the board during desoldering. This trick seems minor, but the results are magical.
- Blowtorch to desolder capacitors from large PCBs
The professional Shenzhen PCB manufacturers suggest employing the blow torch for desoldering if you have a large-sized capacitor. It will consume less time than the desoldering with iron, lessening it to a maximum of 10 seconds from one or two minutes. However, it is hazardous, ending up in burning your PCBs. So, handle it carefully while using this shortcut tip to ensure safety. It is only possible when you place the torch closer to the joint you want to desolder.
Conclusion:
Desoldering PCB is not easy. Yet, it can become handy for you by considering the tips and following the steps discussed in this article. It will save time and money while consuming your efforts to provide optimum performing PCB. Handle your OCB carefully while desoldering to avoid damaging any of your devices.