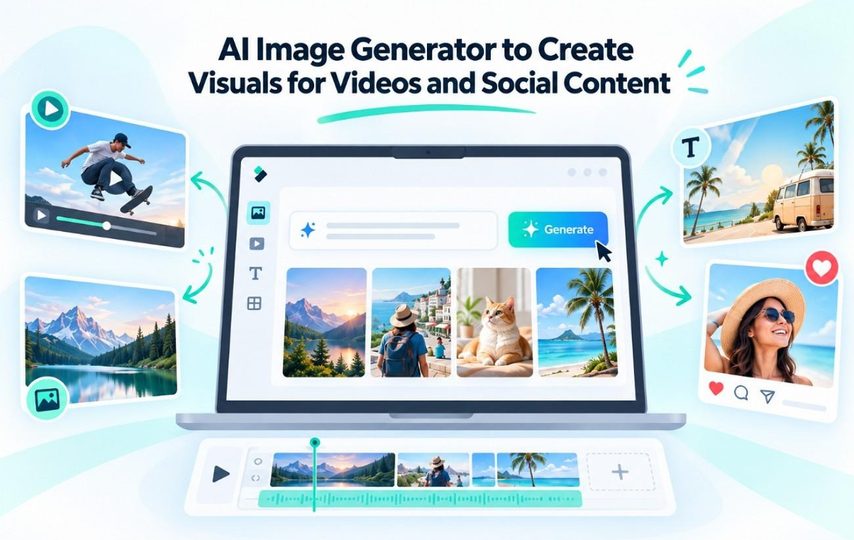

A video does not always come with every visual it needs. An AI image generator lets you describe the missing visual and create it for a thumbnail, title card, background, social post, or extra scene. This means less time scrolling through image libraries hoping to find something that fits.
Filmora makes this process accessible with Nano Banana 2, Nano Banana Pro, and GPT Image 2. The model you choose and the prompt you write shape the final result. This guide covers choosing a model, generating images in Filmora, improving prompts, and reviewing visuals before publishing.
Part 1. What Is an AI Image Generator?
With an AI image generator, you type what you want to see and get a newly created visual instead of picking one from a stock library. The prompt might describe a person, place, lighting, texture, or art style. For video work, that can mean making a missing background, thumbnail, title card, slide, or social graphic.
An AI photo generator is useful when the finished image needs to have a more photographic look. The distinction from stock photos and templates is worth understanding before choosing an approach:
- AI-Generated Custom Visuals: Made on demand from your description, so the subject follows what you specify, but the file is not guaranteed unique. The trade-off is that each run returns something slightly different.
- Pre-Shot Stock Photography: Shot by a person and licensed to many buyers at once, which guarantees a competent image and no exclusivity. The subject stays limited to whatever somebody chose to photograph.
- Pre-Designed Visual Templates: A fixed layout waiting for your content, which solves arrangement rather than imagery. You still have to supply the picture that goes inside it.
Part 2. What to Look for in an AI Image Generator
Competing AI photo generators produce broadly similar image quality, so the differences that matter sit around the generation rather than inside it. The following 5 criteria separate a tool you keep using from one you abandon:
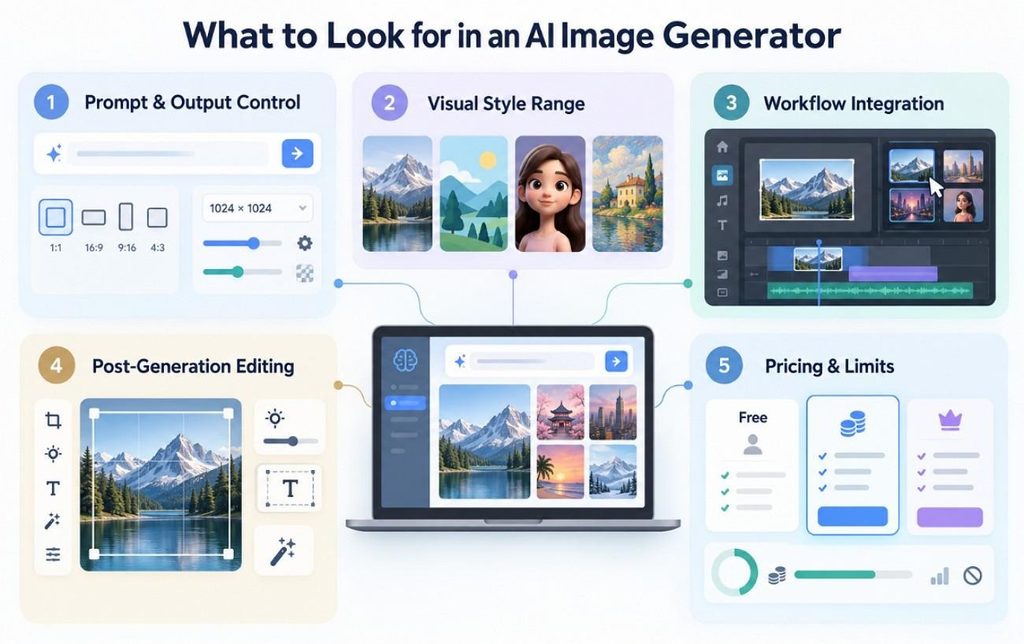
- Prompt and Output Control: Basic prompting is only the starting point. Separate controls for style, aspect ratio, and resolution let you change one setting on the next attempt without rewriting the entire description.
- Visual Style Range: Photorealism suits some projects but not all. Illustration, vector, 3D, and painterly options make it easier to match different content, from course slides to horror thumbnails.
- Editing Workflow Integration: Moving files between separate tools adds unnecessary steps. Generating directly inside the video editing software you already use keeps the image within the same workflow.
- Post-Generation Editing: The first image may be close without being ready to use. A quick crop, brighter exposure, sharper detail, or added text can finish the job. Having those controls in the same tool means fewer files to move around.
- Pricing and Limits: Check what each generation actually uses before choosing a plan. Some tools work with credits or usage caps. A free AI image generator is handy for trying things out, though the available features and output options may be restricted.
Part 3. How to Create an Image with Filmora’s AI Image Generator
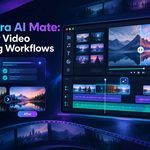
After considering those 5 criteria, the next step is putting an AI image generator into practice. Filmora brings multiple AI image models into the editing workflow, allowing you to choose a model based on the type of visual you want to create rather than relying on a single generation option.
Its AI image generator also provides dedicated controls for style and aspect ratio, so these choices do not have to be written into every prompt. Available styles span realistic, vector, 3D, ink painting, clay, pixel, and comic looks, while ratios such as 16:9, 9:16, 1:1, 4:3, and 4:5 cover common video and social formats. From there, creating an image takes 4 steps:
Step 1. Open AI Image From Stock Media
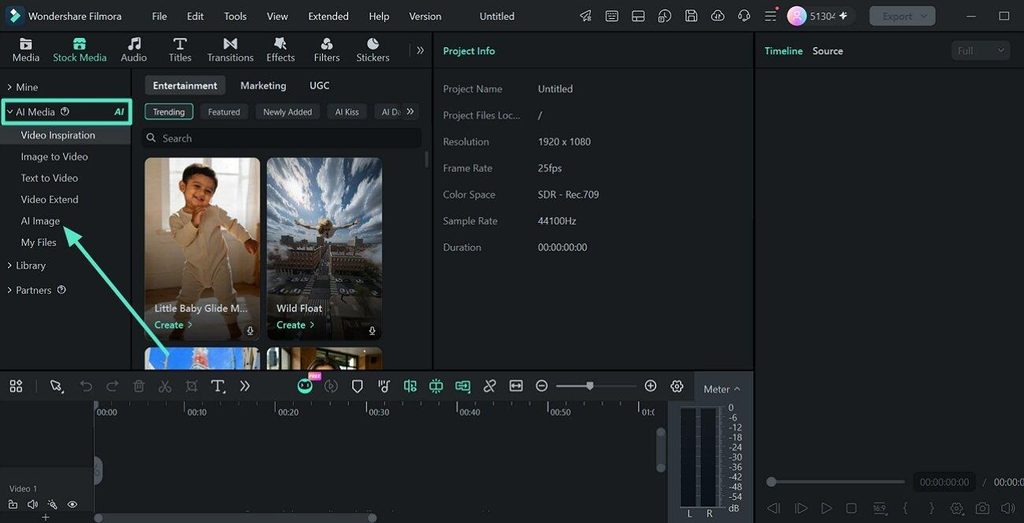
Launch Filmora and open your project. Click “Stock Media” on the top toolbar, expand “AI Media” in the left panel, and select “AI Image.” This opens the image generator directly inside the editing workspace.
Step 2. Choose the AI Model
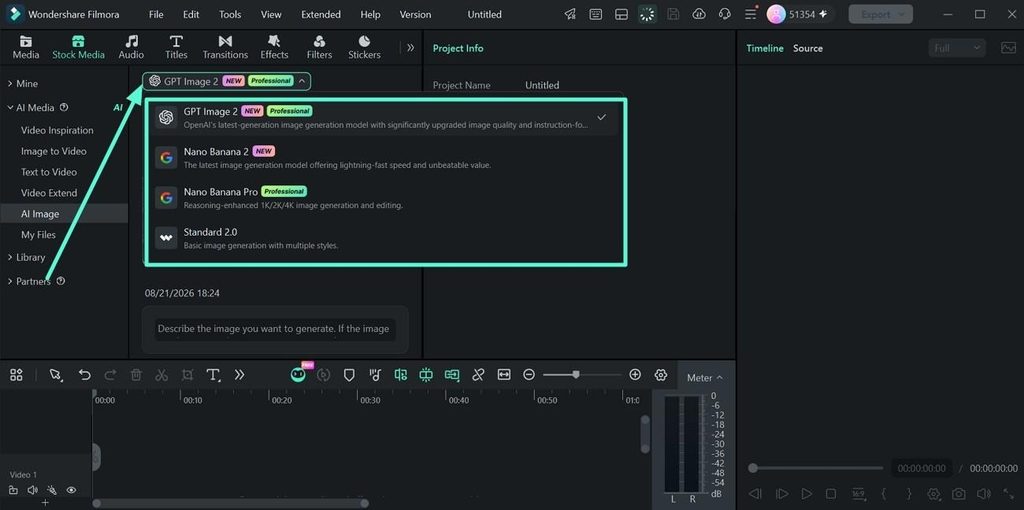
Open the “Model drop-down menu” above the prompt area and select the model that suits your image. The available options shown include “GPT Image 2,” “Nano Banana 2,” “Nano Banana Pro,” and “Standard 2.0.” You can switch models before generating another version of the visual.
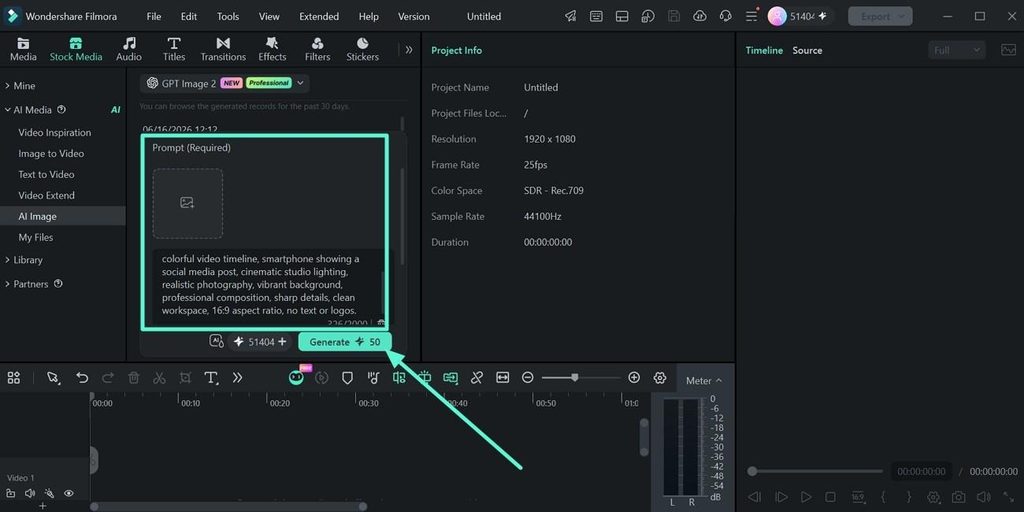
Step 3. Enter Your Image Prompt
Click the “Prompt” field and describe the image you want Filmora to create. Include details such as the subject, setting, lighting, visual style, and composition. Once the description is ready, click “Generate” to create the image.
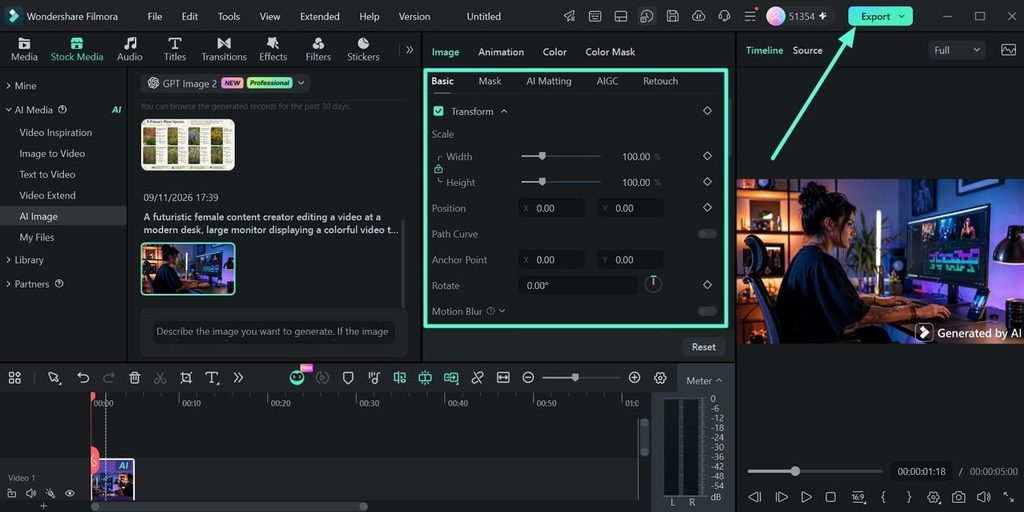
Step 4. Edit and Export the Image
Select the generated image and add it to the “Timeline.” Use the “Image” controls to adjust properties such as scale, position, rotation, mask, AI Matting, AIGC, and retouching as needed. When the visual is ready for your project, select “Export” in the upper-right corner to finish.
Note: Generation draws on your plan’s credit allowance, and free accounts get a limited number at a lower resolution. Decide what the image is for before generating 20 variations of it.
Part 4. How to Write Better Prompts for AI-Generated Images
Filmora recommends giving an AI image generator a subject, setting, and mood or style. The following points show how to arrange them effectively:
Start With the Subject, Purpose, and Audience
Begin by deciding what the image should show, where it will appear, and who will see it. A technical tutorial thumbnail and a meditation app background could feature the same subject but need very different treatments. Defining the purpose first helps keep later visual choices relevant to the intended use.
Add Setting, Mood, Lighting, and Style
Next, describe details that shape the visual direction, such as setting, mood, lighting, color, camera angle, and artistic style. Add only details that contribute to the result you want. Too many competing instructions can make a prompt harder to interpret, while carefully chosen details give the model a clearer creative direction.
Refine One Detail at a Time
If the first result misses the mark, avoid rewriting everything immediately. Change one element, such as the lighting, composition, or style, while keeping the rest of the prompt consistent. This makes it easier to see what improves the output. Image to Prompt can also extract descriptive keywords from an existing reference image.
Part 5. Practical Uses, Review Tips, and Common Mistakes
Whether an AI picture generator belongs in your workflow depends on its practical value, output quality, and limitations. The points below cover what to use it for, what to review, and which mistakes to avoid:
Where Generated Images Do the Most Work
Generated visuals are most useful when existing footage or stock images cannot deliver the exact scene, format, or concept required. Here are five areas where they can add practical value:
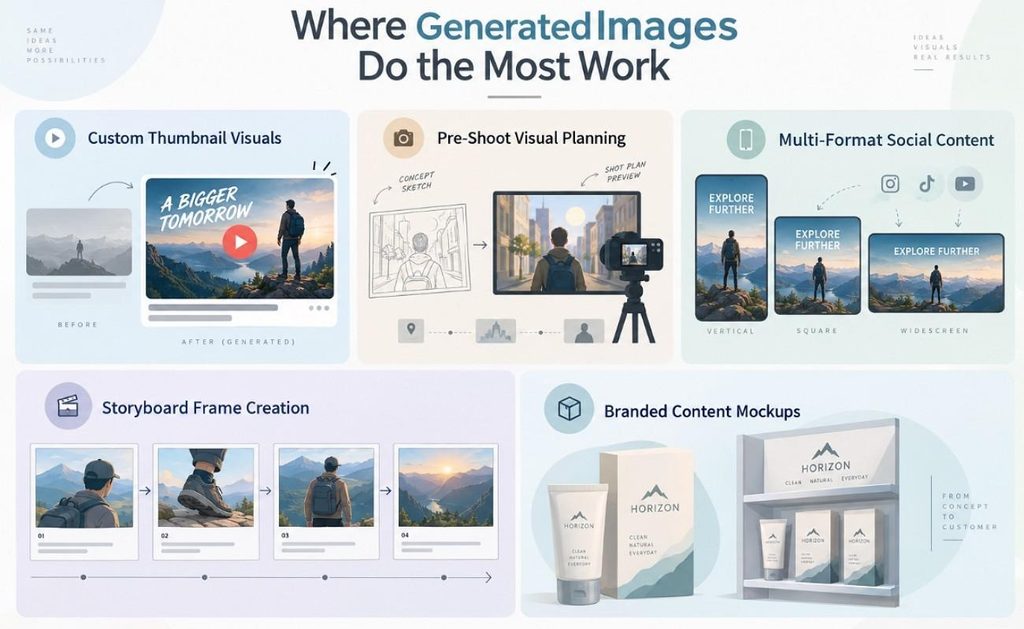
- Custom Thumbnail Visuals: A click-through image has to read at a small size and add something the title does not say. Generating one builds the exact scene rather than cropping a frame that nearly works.
- Pre-Shoot Visual Planning: Before a shoot, a picture of what you intend to film travels better than a description of it. Rough output is still useful here, because nothing is being published.
- Multi-Format Social Content: The same idea usually needs a vertical version, a square version, and a wide one. Generating each at the right ratio avoids the crop that cuts somebody’s head off.
- Storyboard Frame Creation: A run of generated frames can stand in for a storyboard while the script is still moving. Holding them consistent is the hard part, which is what Nano Banana Pro is tuned for.
- Branded Content Mockups: Showing a client what packaging might look like on a shelf is faster to generate than to stage. Nothing in the frame has to exist yet, which is the point of a mockup.
How Generated Images Compare With Stock and Templates
Speed is the usual argument for generation, and it is the weakest one. The honest comparison is closer than either side usually claims.
| Criterion | Generated Images | Stock and Templates |
| Speed | Minutes, including the attempts that miss. | Fast when something suitable exists, slow when it does not. |
| Originality | Others could generate a similar image. | The same photographs appear across competing sites. |
| Customization | The subject is whatever you describe. | You work with what was already shot or designed. |
| Consistency | Varies between runs unless a reference holds it steady. | Reliable, because the asset does not change. |
| Review Needed | Every image has to be checked before it goes out. | Shot by a person, so the checking is lighter. |
Common Mistakes and What to Check Before Publishing
An AI image generator can produce convincing visuals, but every result still needs a careful review before publishing. Work through these checks before the image leaves your editing workflow:
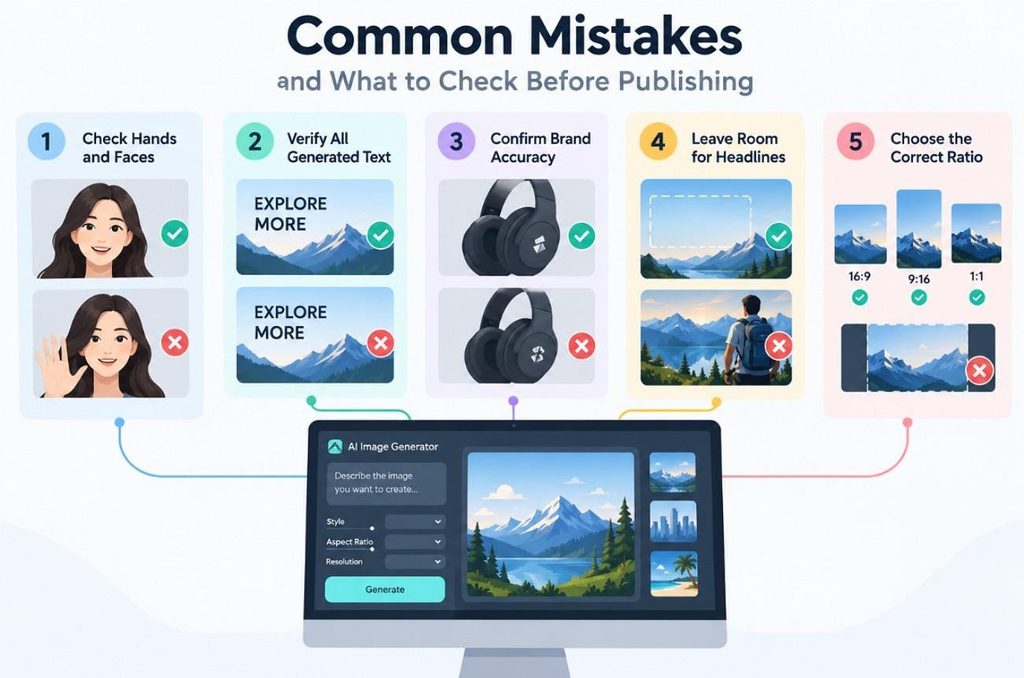
- Check Hands and Faces: Look closely for distorted fingers, unusual facial details, or other anatomical inconsistencies. Zoom in to full size rather than judging the image from a small preview.
- Verify All Generated Text: Text rendered by the model is often almost right rather than right. Read it letter by letter, or remove it and lay real text over the top.
- Confirm Brand Accuracy: Logos, devices, and product packaging may not match the real assets exactly. Replace recognizable branded elements with approved originals when accuracy matters.
- Leave Room for Headlines: A busy center leaves nowhere for text to sit. Generate with the overlay in mind, or ask for clear space on one side of the frame.
- Choose the Correct Ratio: Generating at 16:9 and cropping to vertical afterward throws away half the composition. Set the ratio before generating, since it is a field rather than an afterthought.
Conclusion
Generated visuals have moved from novelty to a routine part of making a video. Operating an AI picture generator takes several steps, so the skill sits in describing what you want and reviewing what comes back. Filmora shortens the distance between that description and a finished frame, which is what turns the tool into a habit rather than an experiment.
FAQs About AI Image Generators
1. What makes a prompt work with an AI image generator?
A working prompt names three things, which are the subject, the setting, and the mood or style. Vague requests such as cool art give the model nothing to work from. Describe what the picture is for as well as what is in it.
2. Can I edit an AI-generated image after it is created?
Every generated image stays editable inside Filmora. Brightness, contrast, and saturation can be adjusted, filters and text overlays added, and the image enhanced without leaving the editor.
3. Is a free AI image generator good enough for published work?
Free tiers are fine for testing and thin for publication, because they usually cap both the number of generations and the output resolution. Check what resolution you actually get before committing an image to a thumbnail that has to hold up at full size.
4. Why does text inside my generated image come out wrong?
Models render letters as shapes they have learned rather than as characters they read, so words often come out close but not correct. GPT Image 2 provides strong text rendering across Filmora’s available models, though laying real text over the image remains the more reliable approach.