
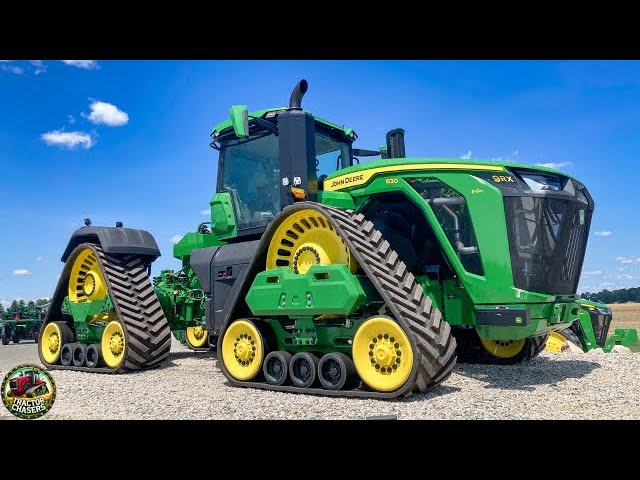

Finding the correct replacement part for a John Deere cotton picker can take longer than expected when the catalog contains hundreds of assemblies, diagrams, and similar-looking components. A rushed search may lead to the wrong part number, an incomplete repair kit, or a component that does not match the machine’s serial-number range. The fastest approach is to begin with accurate machine information and then narrow the search by system, assembly, and diagram position. Operators should avoid relying only on general component names because the same term may appear in several sections. A structured process saves time and reduces ordering mistakes during busy maintenance periods. Learning how to use the John Deere cotton picker parts catalog efficiently can make parts identification much more reliable.
Gather Machine Information Before Opening the Catalog
The catalog search should begin with the cotton picker’s exact model and serial number. John Deere may use different components within the same model family, especially when production updates occur between serial-number ranges. The machine identification plate usually contains the information needed to separate one configuration from another. Record the full serial number exactly, including all letters, zeros, and prefixes. A clear photograph of the plate can help prevent typing mistakes. Keeping this information in the machine’s maintenance record also makes future searches faster.
Additional configuration details may be required for some parts. Cotton pickers can differ by row spacing, number of rows, engine package, electrical system, basket design, or onboard module-building equipment. Optional attachments and previous modifications may also change which assembly is installed. Before searching, note the location and function of the failed component. Determine whether it is on the left or right side and whether it belongs to the front, rear, upper, or lower portion of an assembly. These details help users choose the correct diagram when several similar sections appear.
Start With the Main System Category
Parts catalogs are usually organised by major machine systems rather than by the order in which repairs are performed. Common sections may include the engine, electrical system, hydraulic system, picking units, air system, chassis, operator station, and cotton-handling equipment. Begin by identifying which major system contains the component. For example, a spindle belongs in the picking-unit section, while a leaking lift cylinder is more likely found under hydraulics. Starting in the correct category prevents unnecessary searching through unrelated diagrams. It also helps users understand how the component connects to surrounding parts.
When the system is unclear, consider what the component does rather than what it looks like. A belt near a fan may be listed under the air system rather than under a general drive section. A sensor installed on a row unit may appear in the electrical section or within the picking-unit assembly. Some catalogs repeat related components in more than one diagram for reference. The actual service part may be listed only in one location. Reading the section titles carefully is usually faster than opening every diagram. Consistent terminology becomes easier to recognise after several catalog searches.
Use the Table of Contents Strategically
The table of contents provides a quick overview of the catalog’s structure. Instead of scrolling through diagrams one at a time, scan the headings for the system or assembly most closely related to the repair. Catalog sections are often arranged from larger machine systems to smaller subassemblies. A picking-unit category may contain separate diagrams for spindles, doffers, moisture systems, picker bars, drives, shields, and mounting hardware. The table of contents helps users move directly to the most likely group. This is especially useful when working from a mobile device or a printed catalog.
Pay attention to section names that use manufacturer terminology rather than common workshop language. A part called a “guide” by an operator may be listed as a “support,” “retainer,” or “bracket” in the catalog. Similarly, a moisture-system component may be grouped under spindle cleaning or solution delivery. If the expected term does not appear, look for the name of the larger assembly. Operators should also review neighbouring sections because related parts are sometimes divided across several diagrams. Familiarity with the catalog’s naming conventions can significantly reduce search time.
Read Exploded Diagrams From Large to Small
Exploded diagrams show how individual parts fit within a complete assembly. The most efficient method is to identify the largest recognisable component first and then follow the diagram toward the smaller item. For example, locate the complete picking unit before trying to identify a bushing, seal, or retaining ring. Each component is assigned a callout number that connects the image to the corresponding parts list. The callout number is not the part number and should never be used for ordering. It only identifies the line to read in that specific diagram.
Once the callout is located, review the complete line in the parts list. The line may include the part number, description, quantity, serial-number note, orientation, and additional remarks. Do not stop after finding a description that sounds correct. Similar parts may be listed beside one another with small differences in dimensions or application. Some diagrams also show optional parts that apply only to certain configurations. Reading the complete listing helps prevent incorrect assumptions.
A reliable diagram review should include:
- Assembly title
- Diagram callout number
- Full part description
- Listed quantity
- Serial-number restrictions
- Left-hand or right-hand designation
- Required hardware or related parts
- Notes about kits or substitutions
Pay Attention to Serial-Number Breaks
Serial-number breaks are among the most important details in a parts catalog. A manufacturer may change the design of a component while continuing to use the same machine model name. The catalog may list one part for machines before a specific serial number and another for machines after it. These parts may look nearly identical, but they use different mounting points, connectors, dimensions, or hardware. Ignoring the serial break can result in a part that cannot be installed. Always compare the machine’s complete serial number with the range shown in the listing.
Serial-number notes may appear in the description, remarks column, diagram title, or section heading. Some listings use language such as “up to,” “from,” “before,” or “after” a specified number. Others may identify a production code or equipment option instead of a simple serial range. Users should read all notes connected to the line item before ordering. When the range is unclear, a dealer or parts specialist should verify the application. A screenshot of the catalog page can help explain which listing is being considered.
Understand Part Number Supersessions
Part numbers may change over time, even when the replacement serves the same basic function. A catalog may show that an older number has been replaced or superseded by a newer service number. This can happen because of a design improvement, supplier change, material update, or packaging revision. The newer part may look different from the item removed from the machine. That difference does not necessarily mean it is incorrect. The key is confirming that the supersession applies to the exact model and serial range.
Some supersessions are direct replacements, while others require additional hardware or installation instructions. The updated part may be sold only as part of a kit rather than as an individual component. Buyers should review any notes linked to the replacement number. Previous invoices may still show the older part number, so both numbers should be recorded in the maintenance file. When using the John Deere cotton picker parts catalog, search both the old and new numbers when possible. This provides a clearer view of current availability and approved replacements.
Distinguish Between Assemblies, Kits, and Individual Parts
A single catalog section may list a complete assembly, a repair kit, and individual service components. Users must determine which level of replacement is actually needed. A complete assembly may include shafts, bearings, seals, housings, and mounting hardware, while the repair may require only one bearing. Kits can simplify the process by grouping the parts commonly replaced together. However, ordering a kit without checking its contents may result in unnecessary cost. Review the description and quantity before making a selection.
Catalog illustrations can sometimes create confusion because the image may show a complete assembly while the line item refers to only one component. The listed quantity may indicate whether the number applies to a single piece, a pair, or a packaged set. Notes may also state that certain hardware is included or must be purchased separately. Before ordering, compare the catalog listing with the parts removed from the machine. Inspect related components while the assembly is accessible. Ordering all required seals, bearings, retainers, and fasteners at once can prevent a second delay.
Search by Part Number When You Have One
A known part number can provide the fastest route through the catalog. The number may come from the existing component, an old invoice, a maintenance record, or a previous order. Enter the complete number without adding spaces or changing the sequence. If no result appears, check for transcription errors and confirm that letters have not been confused with numbers. Searching an older number may reveal a current superseding number. This is one of the most efficient ways to verify whether a replacement is still active.
Not every number marked on a component is an orderable service part. Castings may display mould numbers, engineering references, or supplier production codes. Bearings and electrical items may carry manufacturer numbers that differ from the John Deere catalog number. Use the visible number as a clue rather than automatic proof. Compare it with the diagram, description, and machine application. A trusted supplier can often cross-reference the number when the catalog search is inconclusive.
Use Keyword Search Carefully
Keyword search is useful when the part number and exact diagram location are unknown. Begin with a specific term, such as “moisture pad,” “spindle bushing,” or “fan belt,” rather than a broad word like “picker.” If the first term produces no useful results, try related manufacturer terminology. Searching by the larger assembly name may work better than searching for the small component. Users should then verify every result within the appropriate model and serial range. Keyword matches alone do not confirm compatibility.
Avoid selecting the first result simply because the description appears familiar. Several components may share the same basic name but differ by row position, orientation, or machine configuration. Open the diagram connected to the search result and confirm where the part is installed. Check the surrounding components to make sure the correct assembly has been selected. Measurements and photographs can provide additional confirmation. Keyword search is most effective when combined with diagram and serial-number verification.
Confirm Orientation and Quantity
Many cotton picker parts are position-specific. Left-hand and right-hand components may use mirrored shapes, different hole patterns, or opposite mounting angles. Orientation is generally determined from the operator’s normal seated position, but the catalog notes should always be checked. Front and rear row-unit components can also carry different numbers. Upper, lower, inner, and outer pieces may look almost identical in photographs. A clear location description helps avoid these common ordering mistakes.
Quantity is equally important because the catalog may list the number required for one assembly rather than the entire machine. A quantity of two may mean two parts per row unit, not two parts for the complete picker. Buyers should calculate the total based on the number of rows or assemblies being serviced. Some items are sold individually even when several are shown in the diagram. Others are packaged as sets under one part number. Confirming quantity before checkout prevents shortages and excessive orders.
Verify the Selection Before Ordering
Before placing an order, compare the catalog result with all available machine and component information. Confirm the model, serial number, assembly, orientation, part description, and quantity. Review any supersession or kit notes. If the old component is available, compare dimensions, mounting points, connectors, and visible markings. Clear photographs can help a supplier confirm the selection. A few minutes of verification can prevent several days of delay.
Prepare the following details for the supplier:
- Machine model
- Complete serial number
- Catalog part number
- Old or superseded number
- Assembly and diagram name
- Callout reference
- Part description
- Required quantity
- Component location
- Photographs and measurements
- Desired delivery date
Frequently Asked Questions
Where should I start in a John Deere parts catalog?
Start with the machine model and complete serial number. Then select the major system that contains the component. Use the table of contents to narrow the search to the correct assembly.
Is the diagram callout the same as the part number?
No. The callout only links the illustrated component to a line in the parts list. The actual orderable part number appears in that line.
Why are two different part numbers listed for the same component?
The numbers may apply to different serial ranges, configurations, or orientations. One may also be a superseded version of the other. Read all notes before choosing.
Can I search using a number stamped on the old part?
Yes, but confirm that the marking is a service part number. It could be a casting, supplier, or production code. Verify it against the catalog and machine details.
How do I know whether I need a kit or one component?
Review the catalog description and included items. Inspect the complete assembly to identify all worn parts. A kit may be useful when seals, bearings, and hardware are commonly replaced together.
What should I do if the catalog result is unclear?
Record the diagram, callout, possible part numbers, and machine serial number. Send that information with photographs to a knowledgeable dealer or supplier. Ask for written compatibility confirmation.
Build a Faster Catalog Search Process
A repeatable search process makes catalog navigation faster each time a repair is needed. Begin with the machine identification, select the major system, open the correct assembly, and locate the component in the exploded diagram. Then read the complete parts-list entry and check serial ranges, orientation, quantity, and supersessions. Save verified part numbers in a machine-specific maintenance record. Include screenshots, supplier details, and installation notes when helpful. This creates a practical reference that the entire maintenance team can use.
The John Deere cotton picker parts catalog is most effective when it is treated as a technical identification tool rather than a simple shopping list. Diagrams provide context, while serial-number notes and descriptions confirm application. Careful navigation reduces incorrect orders, return freight, and harvest downtime. Operators should avoid shortcuts based only on appearance or general component names. A verified catalog search supports more accurate inventory planning and faster repairs. With a structured approach, growers and contractors can find the right section and order the correct part with greater confidence.