

Recover files after OneDrive sync problems by checking the cloud account first, then the Windows computer where the files were originally stored. OneDrive provides useful recovery options, but synchronization is not the same as a separate backup. A deletion, overwrite, or folder change can travel across connected devices before the user realizes what happened.
The good news is that a missing file is not always permanently gone. It may still exist in another Microsoft account, the OneDrive Recycle Bin, Version History, a local Windows folder, or unallocated space on the original drive.
The order in which you check these locations matters. Randomly moving folders, reinstalling OneDrive, or continuing to use the affected drive may make recovery more difficult. Instead, follow a calm, read-first recovery process.
Why Files Disappear After OneDrive Sync
OneDrive synchronizes changes between the cloud and connected devices. When you add, rename, edit, move, or delete a file inside a synchronized folder, OneDrive normally applies that change elsewhere.
This behavior makes daily work convenient, but it can also make an accidental action spread quickly. Common causes of missing files include:
- Deleting a synchronized folder on another computer
- Signing in with the wrong Microsoft account
- Moving Desktop, Documents, or Pictures during folder backup setup
- Unlinking a PC before synchronization finishes
- Confusing an online-only file with a permanently deleted file
- Overwriting a document through AutoSave
- Changing which OneDrive folders are available on the computer
- Removing a shared folder or losing access to shared content
- A failed Windows update, system reset, or storage error
Before starting recovery, determine whether the file disappeared from OneDrive, the local computer, or both. That distinction will tell you where to look first.
Check OneDrive Before Scanning the Computer
Cloud recovery options are usually the fastest and least invasive. Work through them before using data recovery software.
Search OneDrive on the Web
Sign in at OneDrive.com and search for the missing file. Try more than the exact filename. Search by file extension, project name, date, location, or a word that may appear in the document.
Make sure you are using the correct account. Many people have separate personal, work, and school Microsoft accounts. A file may appear missing simply because OneDrive is displaying a different account.
Also check Personal Vault separately. Files stored there may not appear in standard search results while the vault is locked.
Open the OneDrive Recycle Bin
If a synchronized file was deleted, it may still be available in the OneDrive Recycle Bin. Select the item and choose Restore. OneDrive should return it to its previous cloud location.
For work or school accounts, retention settings can depend on the organization. If the file is not visible, contact the Microsoft 365 administrator promptly. The administrator may have additional recovery options that ordinary users cannot access.
Use Version History for Overwritten Files
Sometimes a file is present but its useful content has disappeared. AutoSave, a mistaken edit, or another collaborator may have replaced the version you need.
OneDrive Version History can restore an earlier copy of many file types, not only Microsoft Office documents. On OneDrive.com, right-click the file and open Version history. You can also right-click a synchronized file in Windows File Explorer and choose Version history when that option is available.
Review the dates carefully before restoring. If you are unsure, download or save a copy of the older version instead of immediately replacing the current one.
Consider a Full OneDrive Restore
Eligible Microsoft 365 users may be able to restore an entire OneDrive to an earlier point. This can help after a large accidental deletion, unwanted synchronization event, or widespread file change.
However, a full restore affects many files at once. Review the selected date and recent activity carefully before proceeding. For one or two missing files, the Recycle Bin or Version History is usually more precise.
Search the Windows Computer
If the cloud checks do not solve the problem, investigate the local device where the file was created or last edited.
Start with File Explorer. Search the original OneDrive folder, the user profile, Desktop, Documents, Pictures, Downloads, and any folders outside OneDrive. Sort the results by date modified and search by extension, such as .docx, .xlsx, .pdf, .jpg, or .mp4.
Then check:
- The Windows Recycle Bin
- Other user profiles on the computer
- The Windows.old folder after a major Windows upgrade
- Office AutoRecover locations
- Recent file lists in Word, Excel, or PowerPoint
- Email attachments and messaging-app downloads
- External drives used for manual backups
Pay attention to OneDrive status icons. An online-only file may appear in File Explorer without occupying normal local storage. In that case, local recovery software cannot recover its cloud-only contents because the complete file was never stored on that drive.
Data recovery becomes relevant when a full or partial local copy previously existed and was later deleted, lost, or made inaccessible.
Recover Local Files with Drecov
When the missing files are no longer available through OneDrive, Windows search, or the Recycle Bin, PandaOffice Drecov provides another option for examining the original Windows storage device.
The software supports recovery from Windows PCs, internal and external hard drives, USB drives, SD cards, and memory cards. It can search for documents, photos, videos, audio, archives, emails, and other common file types.
More importantly, Drecov performs scans in read-only mode. It searches the selected storage location without intentionally modifying the source data. This is especially useful when every additional write could reduce the chance of retrieving a deleted local file.
Drecov offers two scan choices:
- Quick Scan looks for recently deleted data and provides faster initial results.
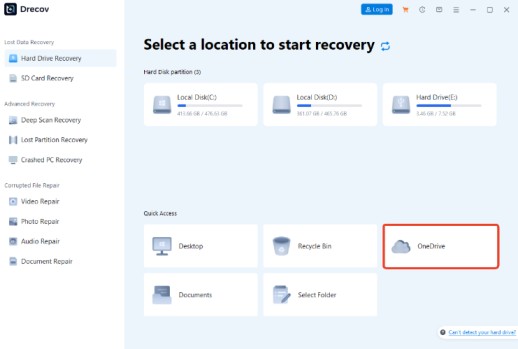
- Deep Scan examines the selected storage area more thoroughly when the quick scan does not locate the required files.
Users can preview supported files before recovery, filter scan results, and pause or resume longer scans. These features help when a drive contains thousands of results and only a particular document or project folder matters.
How to Recover Files After OneDrive Sync with Drecov
1. Identify the Original Storage Location
Determine where the local file existed before it disappeared. It may have been in the OneDrive folder on the system drive, another internal partition, or an external storage device.
Select the original location during the scan. Scanning every connected drive adds time and may make the results harder to review.
2. Start with Quick Scan
Launch Drecov, choose the original file location, and run Quick Scan first. This mode is suitable for recent deletion and may locate the missing data without a lengthy search.
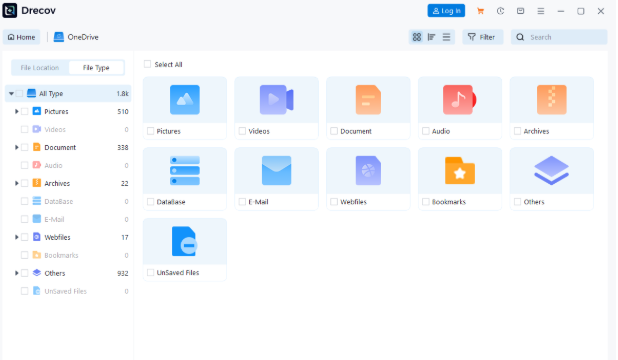
You can review results while the program scans. Filter by file type, filename, size, or date when those details are known.
3. Preview and Verify the Files
A familiar filename does not guarantee that a recovered file is complete. Use the preview function where supported and check whether the document, photo, or video appears usable.
For projects containing several related files, recover the complete folder or all relevant components. A video-editing project, for example, may require source clips, audio, graphics, and project metadata.
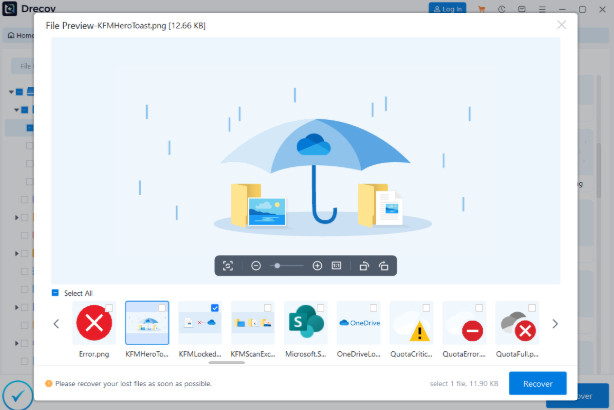
Recover selected files to another healthy drive. Never save them back to the same source location during the recovery process.
After recovery, open the files and verify their contents. Check documents for missing pages, spreadsheets for intact worksheets, archives for extraction errors, and videos for complete playback.
Know When Software Is Not the Right Answer
Drecov is intended for logical data-loss situations involving storage that remains stable enough to scan. It cannot repair physical drive damage.
Stop a do-it-yourself attempt if a hard drive clicks, disconnects repeatedly, fails to spin, becomes unusually hot, or causes Windows to freeze. The same caution applies to a device that suffered water, fire, or impact damage.
Repeatedly powering an unstable drive may worsen the damage. In such cases, disconnect it and consult a professional data recovery service.
Prevent the Next Sync Problem
OneDrive adds useful protection, but it should form only one part of a broader backup plan.
Keep an independent copy of important files on another storage device or backup service. Before deleting a large synchronized folder, confirm whether the same action will affect the cloud and other computers. In addition, review OneDrive’s sync status before resetting Windows, replacing a PC, or disconnecting an account.
For critical projects, retain milestone copies with clear dates rather than relying only on the latest synchronized version. Periodically test whether backups can actually be opened and restored.
Final Thoughts
To recover files after OneDrive sync problems, begin with the least invasive options: search the correct cloud account, inspect the OneDrive Recycle Bin, review Version History, and check the local Windows folders.
If a local copy once existed but is no longer accessible, PandaOffice Drecov can scan the original storage location using Quick Scan or Deep Scan. Preview the results, recover only what you need, and save the files to another healthy drive.
Most importantly, stop writing new data to the affected storage as soon as you notice the loss. A careful response gives you more recovery options than a rushed repair attempt.