

Losing years of family photos or a report due at 9 a.m. in a single careless click is the kind of gut-punch nobody forgets. Before you spiral into panic, take a breath — in the vast majority of cases the bytes are still sitting on the platter, quietly waiting to be rescued.

Windows data recovery means getting lost, deleted, or suddenly inaccessible files back from internal disks, external drives, and USB storage running a Windows OS. The loss might trace back to a mistaken format, a crashed partition, or a sudden blackout, yet the underlying sectors usually stay readable until something new overwrites them. One important caveat: on modern SSDs, the TRIM command can wipe freed blocks within minutes, so speed matters even more there. The real trick is acting fast and picking the right method.
Here’s how to bring your files home without turning a rough day into a permanent loss.
Why Data Loss Happens on Windows 11/10?
There are so many reasons that your files get missing or lost. We list the main factors here:
- Accidental deletion or Shift+Delete — We’ve all highlighted the wrong folder and emptied the Recycle Bin without a second thought. The file entry vanishes from the table, but the raw content stays put until overwritten. It’s the number-one reason people search for Windows data recovery help.
- File system corruption — An unsafe eject or a surprise shutdown can scramble the NTFS or FAT32 structure, leaving Windows showing the drive as ‘RAW’ or nagging you to format it. CHKDSK errors often point straight here.
- Hardware wear and bad sectors — Spinning drives degrade with age; a tired head or unstable platter gradually marks sectors unreadable, and whatever lived there slips out of reach. Listen for clicking sounds — that’s a classic warning sign.
- Malware and ransomware — Some strains silently encrypt partitions, while others simply hide your data behind a locked screen you can’t bypass. Always keep a backup to dodge the worst outcomes.
Stop using the affected disk the moment you notice the gap. Every new download, screenshot, or even an automatic Windows update can land on the very sectors you’re hoping to retrieve.
Best Windows Data Recovery Tool — MyRecover
When free built-in tricks fall short, a dedicated program earns its keep. The reliable Windows data recovery software from MyRecover pairs a deep scan engine with a friendly wizard, so you don’t need a forensic degree to bring files home.
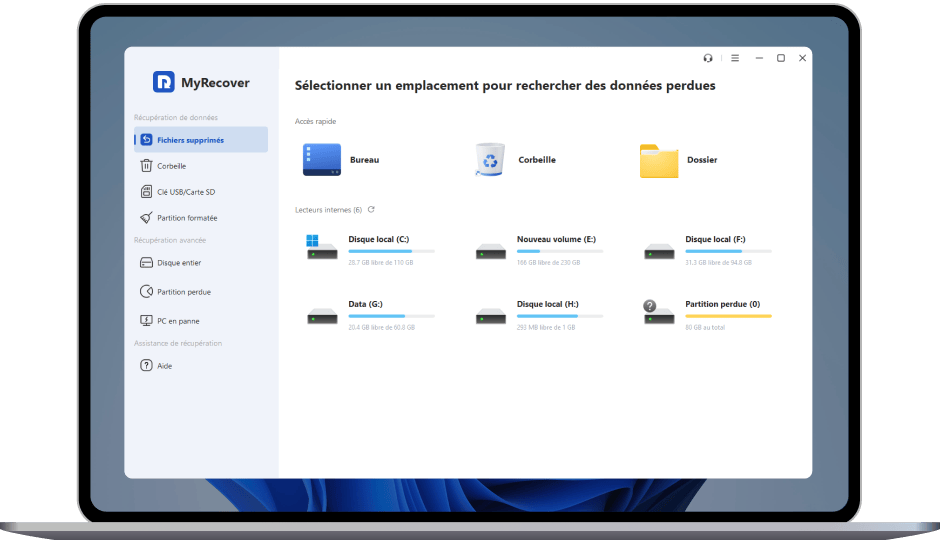
- It works on both HDDs, SSDs, and other 500+ devices, which covers all Windows machine in use today. That’s where a purpose-built approach to hard drive recovery genuinely makes the difference.
- Scans 1,000+ file types — JPEG, PNG, and HEIC photos, MP4 and MOV video, DOCX, PDF, and XLSX documents, plus ZIP archives all surface in the results, far more than Windows’ own tools manage.
- Two scan modes — A quick scan pulls recently deleted items in seconds; the deep scan crawls raw sectors for formatted or long-lost data.
- Broad file system support — NTFS, FAT32, exFAT, and ReFS are all covered, from a fresh external SSD to a decade-old spinning disk.
- Filter and search toolbar — Find specific files quickly from the results using keywords, filename, etc.
- 500 MB free recovery — Trial the full pipeline on small jobs without spending a cent.
For drives that Windows refuses to open, the same suite also ships a free NTFS hard drive recovery tool to pull data from RAW or corrupted partitions.
How to Recover Deleted Files from Hard Drive with MyRecover
Important: install MyRecover on a different disk than the one you’re rescuing. Running it on the failing drive can overwrite lost data. If the target is your system disk, use another PC or attach it as a secondary drive through a USB adapter.
Here is how to recover deleted files from a hard drive on Windows 11/10 with MyRecover:
1. Download and install — Grab MyRecover on a healthy Windows machine, then connect the problem hard drive (internal or external) so the system recognizes it in the drive list.
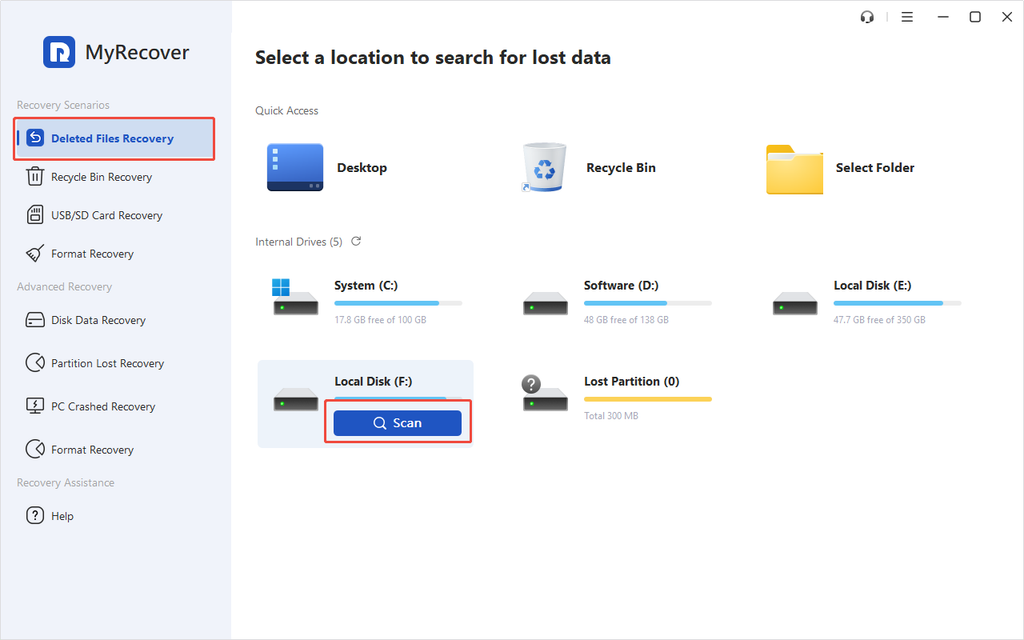
2. Launch and scan — Open the program, choose Deleted Files Recovery or Disk Data Recovery, hover over the target drive, and click Scan. The quick pass finishes in moments.
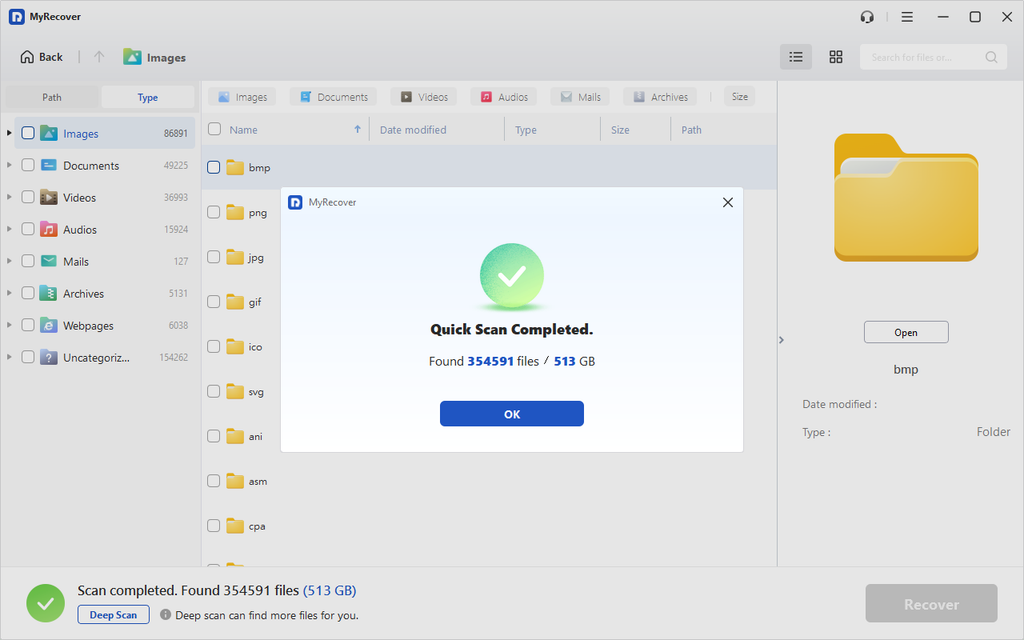
3. Select files — Browse the tree by folder or file type, type a name into the search box. Tick the boxes next to everything you want back.
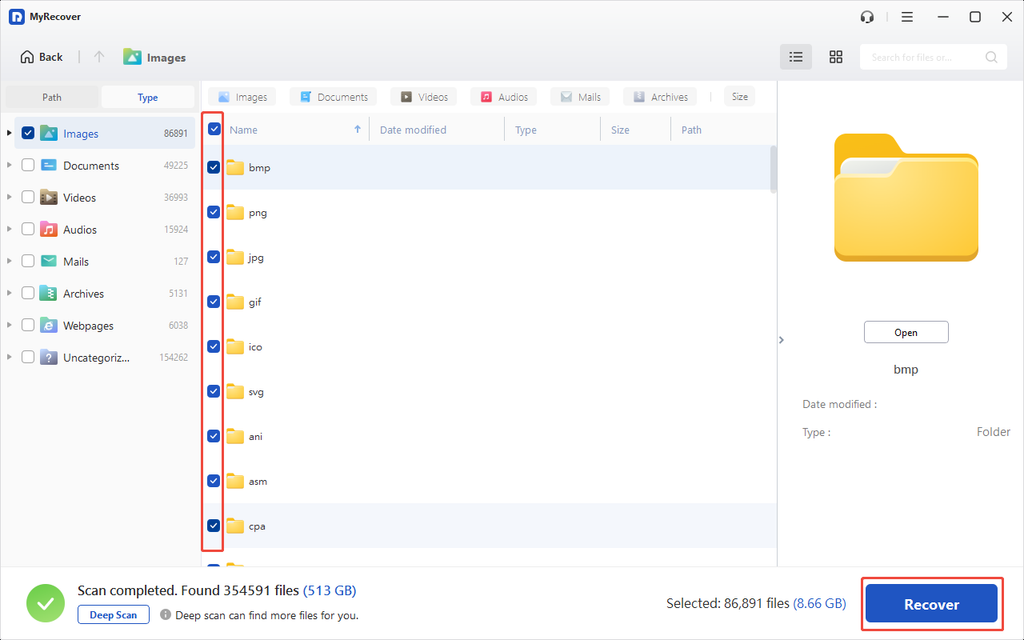
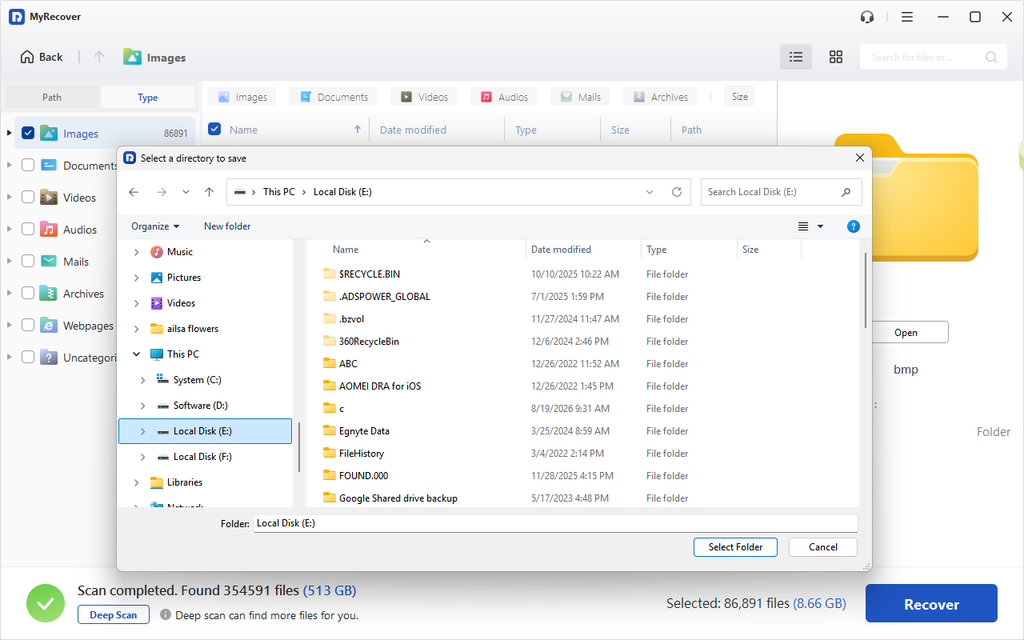
4. Recover and save — Hit Recover, then choose a safe destination on a separate drive. Never write recovered files to the source disk, or you risk a second loss.
Tips:
- Run Deep Scan overnight on huge volumes — it’s thorough but time-consuming
- Use the date and size filters to skip junk, and always preview before recovery to avoid wasting space on corrupt copies, previewing is an advanced feature.
- Need unlimited recovery, or recover files from a crashed computer? The Pro tier unlocks them.
If the Recycle Bin was your only safety net, our recover recently deleted files on Windows guide walks through every built-in option step by step. And when do-it-yourself isn’t enough, professional data recovery services and a trusted hard drive recovery service can take over for physically damaged platters that software alone can’t fix.
Conclusion
Windows data recovery doesn’t have to mean panic or a pricey lab visit. Follow the four steps above and you can recover deleted files and complete a full hard drive recovery from most disks in minutes, right at your desk. Keep the drive idle, lean on a solid scanner, and your photos, invoices, and memories stand a real chance of coming home. Even a formatted or RAW disk is often recoverable with the deep scan, so don’t give up on a drive just because Windows can’t read it.