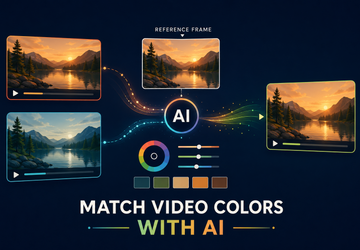
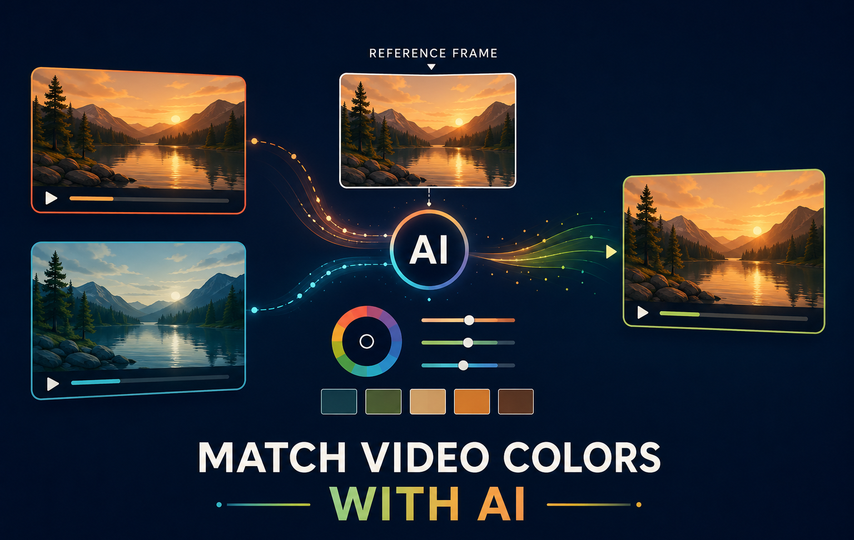

Getting a good color match starts with selecting the right reference clip. Your chosen reference sets the visual direction for the second video clip. Poor reference footage can lead to unwanted colors across the matched result.
Next, select a clear frame that represents the preferred look of the footage. Preparing target footage beforehand gives the matching process a stronger starting point. This guide covers the complete process using the Filmora video editor.
Part 1. Choose Which Clip Should Be the Reference
Reference selection determines the visual target used during an AI color match process. Filmora’s AI color matching tool uses reference colors to create a consistent look across clips. The table below explains which qualities help you choose suitable reference footage:
| What to Look For | Why It Matters |
| Acceptable Exposure | A shot that is too dark can make matched footage appear darker. |
| Deliberate White Balance | The accepted color temperature influences the overall tone of matched footage. |
| Natural Skin Tones | Accurate faces help prevent noticeable skin color differences between matched clips. |
| Representative Lighting | Similar lighting gives the target clip a more realistic appearance to follow. |
| Important Product Colors | Accurate product and brand colors help maintain their intended appearance after matching. |
| Preferred Visual Direction | The reference establishes the final look you want the target footage to reach. |
Avoid overexposed or extremely saturated clips because they can distort matching results. Wide or medium shots provide more scene information than close-up footage does.
Part 2. Select a Representative Reference Frame
Choosing the right frame helps the color matching tool read representative visual information. The examples below show 6 frame types you should avoid during matching:
- Motion Blur: Mid-movement frames can smear colors and misrepresent how the shot normally appears.
- Transitions and Flash Frames: Blended or flashing images do not represent the actual scene accurately.
- Temporary Lighting Changes: Passing lights or sudden brightness changes can distort the normal scene appearance.
- Overexposed Windows: Blown highlights can push the reference toward an unusually bright appearance.
- Blocked Subjects or Extreme Close-Ups: Limited scene information makes these frames less useful for accurate matching.
- Effects the Target Does Not Have: Added effects can influence colors absent from the target footage.
Frames from the middle usually represent the shot more consistently during matching. Similar content gives both clips enough common visual information for accurate analysis.
Part 3. Prepare the Target Clip Before Matching
Target footage needs a usable baseline before starting the color match process. Understand what to correct and where to stop adjusting before matching.
Fix What Would Distort the Result
Check target footage for major exposure errors and incorrect white balance first. Severe darkness or strong color casts can affect the generated matching result. Correct these technical problems before matching to avoid extra adjustments afterward.
Stop Short of a Full Grade
Avoid creating a complete visual look on target footage before starting matching. Existing color adjustments may change again when you apply the match. Keep footage neutral and balanced enough to provide a clean starting point.
Part 4. Match the Two Clips in Filmora
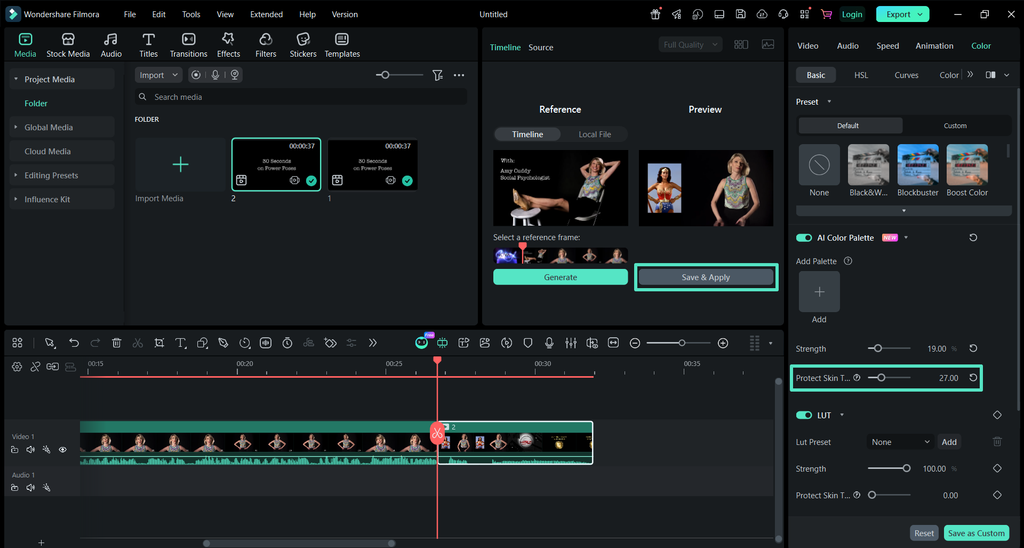
Your reference and target clips are now prepared for AI color matching. The AI Color Palette guide covers the controls used when matching reference and target footage. Follow the steps below to complete the matching process in Filmora:
Step 1. Put Both Clips on the Timeline
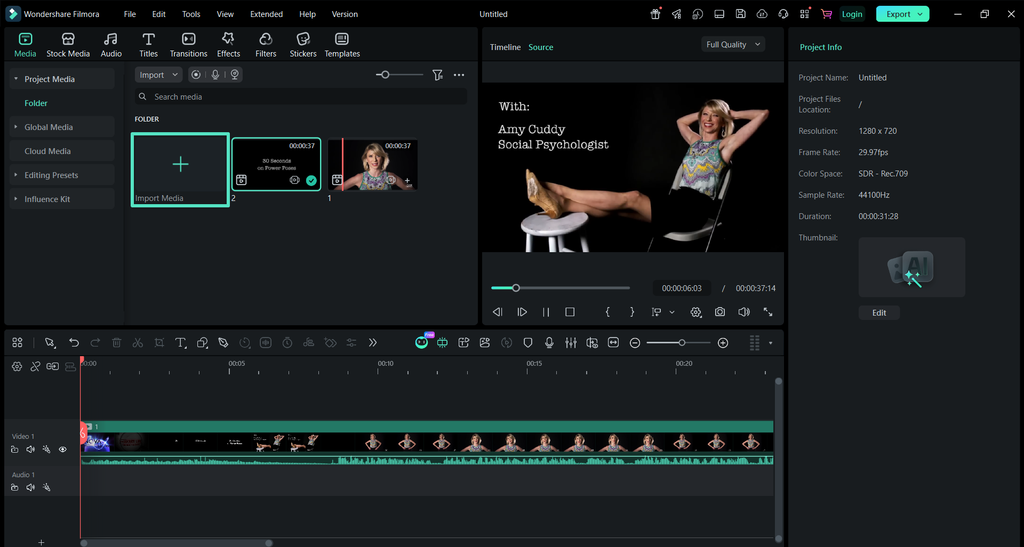
First, create a new project in Filmora and use the “Import Media” option to add clips from different cameras. Next, drag and drop the videos over the timeline to start working.
Step 2. Open AI Color Palette on the Target
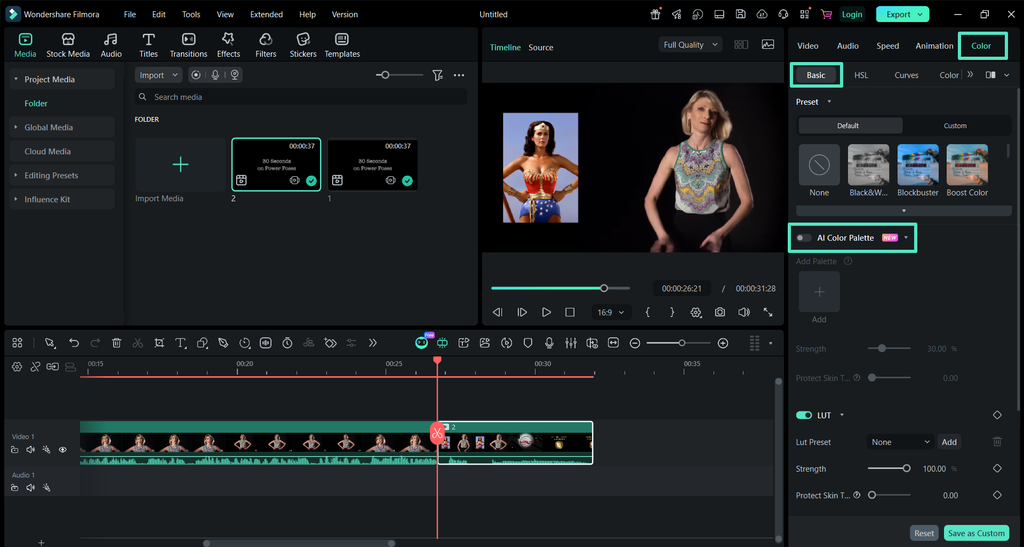
Next, select the clip you want to change and press the “Color” tab in the properties panel on the right side. Afterward, choose “Basic” and turn on the “AI Color Palette” toggle.
Step 3. Choose the Reference Source and Frame
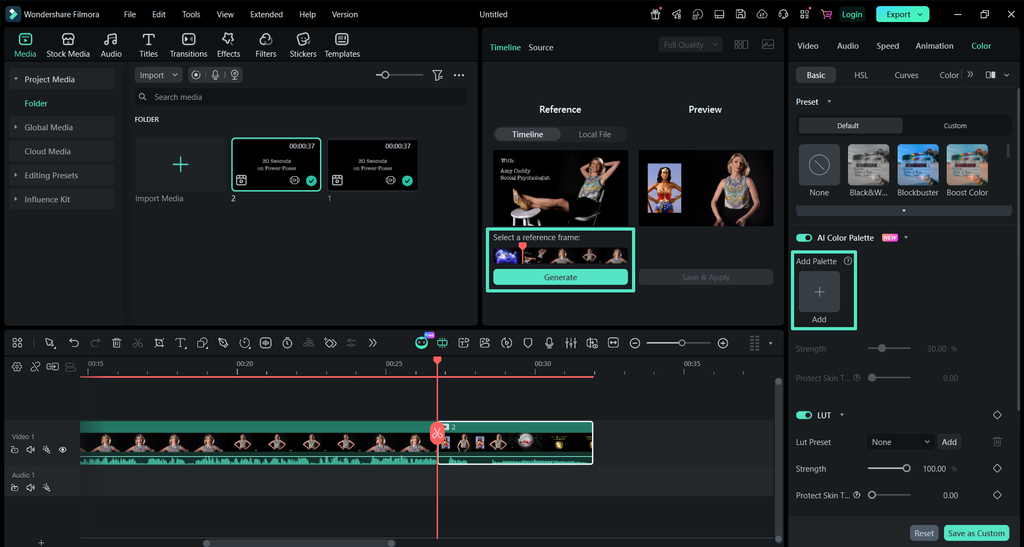
In the preview section, press the “Add” button and choose a reference frame from the video already imported or use “Local Files” to bring something from your device. Once done, press “Generate.”
Step 4. Set the Color Palette Strength
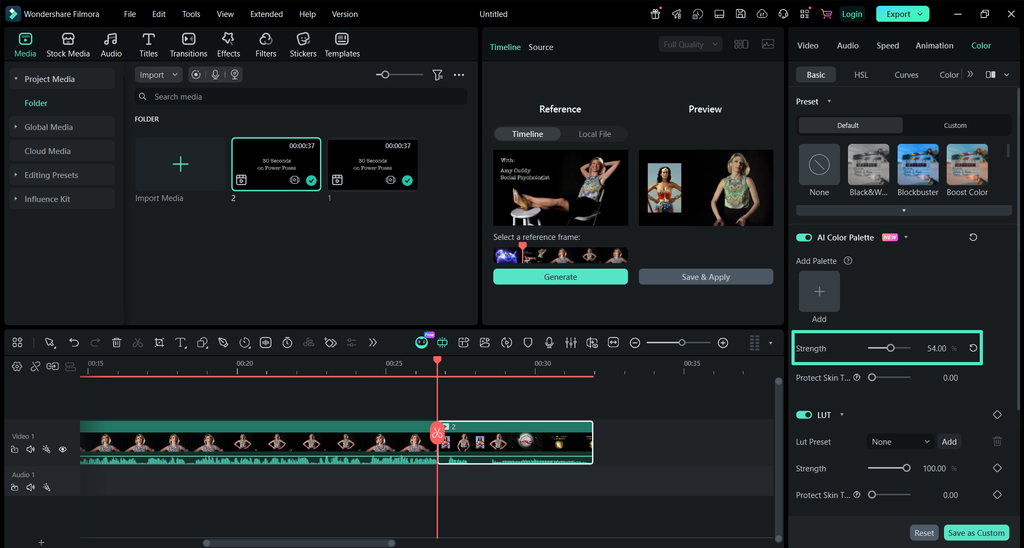
After that, compare the differences in the “Preview” section and use the “Strength” slider to refine the color match.
Step 5. Test Skin Tone Protection and Apply
If people appear in either clip, turn on “Protect Skin Tones” and adjust it while watching a face. Click “Save & Apply” once the result looks right in the preview panel. Finally, export a combined clip once the colors are matched.
Part 5. Compare More Than One Point in the Target Clip
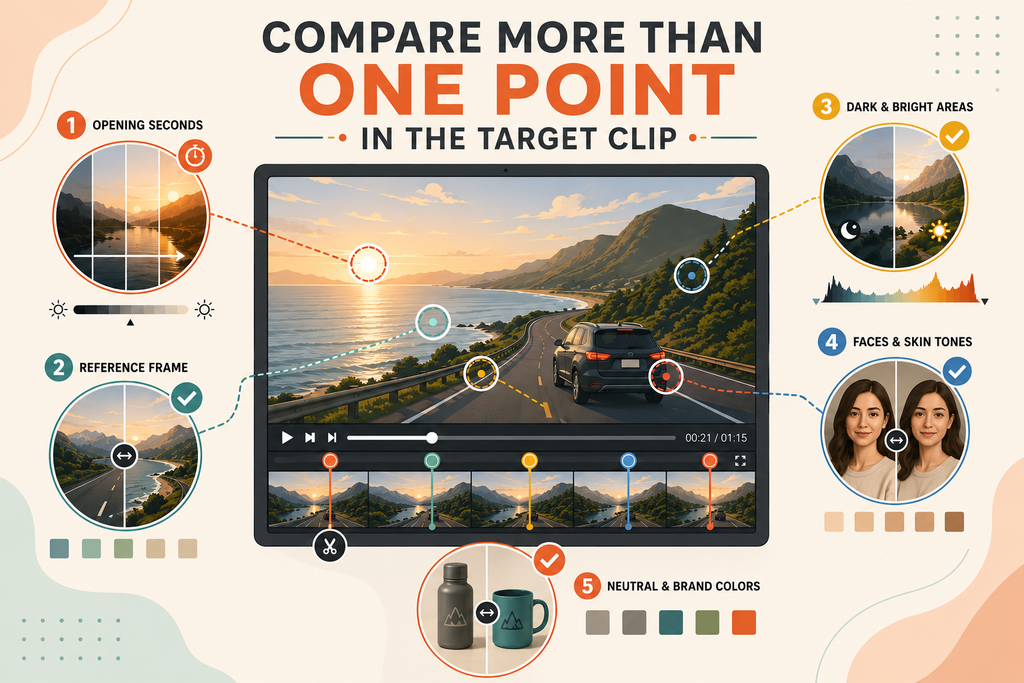
One frame cannot confirm whether an AI color match works across footage. Below are the key areas you should review throughout the target clip:
- Opening Seconds: Check whether changing light creates color differences during the beginning of the footage.
- Matched Reference Frame: Confirm this frame follows the reference without unwanted color or exposure shifts.
- Darker and Brighter Sections: Check shadows and highlights retain enough detail after applying the match.
- Frames With Faces: Review skin tones for unnatural color shifts across different parts of footage.
- Neutral and Branded Objects: Check gray surfaces and brand colors for unwanted casts after matching.
Part 6. Export a Short Test Before Completing the Project
A short export shows how the color matching tool performs during playback. Look at the table below for 5 areas worth checking before completion:
| What to Check | What Going Wrong Looks Like |
| The Edit Point | A visible change in color or tone when one shot switches to another. |
| Skin Tones Across the Cut | Faces appear warmer or cooler when the edit moves between both clips. |
| Product and Brand Colors | Packaging or brand colors change noticeably between the two matched video clips. |
| Tonal Detail | Shadows or highlights lose visible detail after the matching process. |
| Overall Strength | The matched look feels too strong or unnatural when viewed during playback. |
Lower the Strength first when the cut still shows noticeable color differences. Over-matching causes more problems than a weaker adjustment.
Conclusion
Matching two clips involves several visual judgments before the actual color match. Choose a sound reference clip and select a frame representing the shot. Correct target problems that could affect the analysis before matching in Filmora. Keep the matching strength restrained and review the cut before finalizing results.