If the need arises to capture either a complete or partial screenshot on your Windows 10 or Windows 11 PC, you can conveniently achieve this task using the pre-installed tools and keyboard shortcuts available in these operating systems. You will learn in this article how to take a screenshot on a computer.
Below, we present several techniques that cater to your requirements. We have tailored these methods to suit various preferences, whether you wish to save your entire screen or only a specific section. Note that we’ve gathered a comprehensive list of the most effective techniques for taking screenshots on Windows. So, let’s learn how to take screenshots on Windows.
The Print Screen Button For Screenshot on Windows
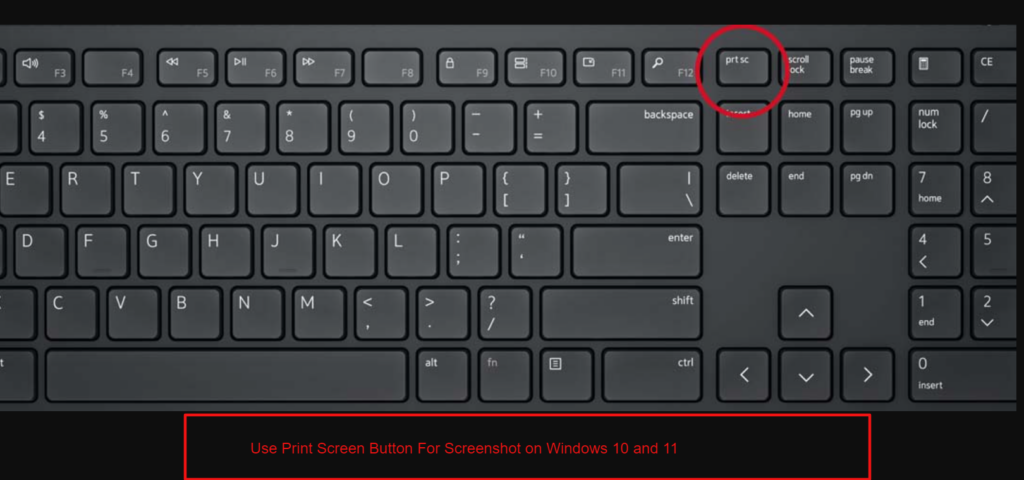
Image credit- dell.com
Note that your keyboard includes a dedicated key labeled “Print Screen.” True to its name, this key serves the purpose of capturing the current contents displayed on your computer screen. This key is identifiable as either “Print Screen” or simply “PrtSc.”
- Upon pressing the Print Screen key, a small menu will emerge at the upper center of your computer screen.
- Selecting the particular area you want to capture will store the screenshot in your clipboard. Depending on your requirements, you also have the option to click on the relevant icons within the menu to initiate the screenshot capture.
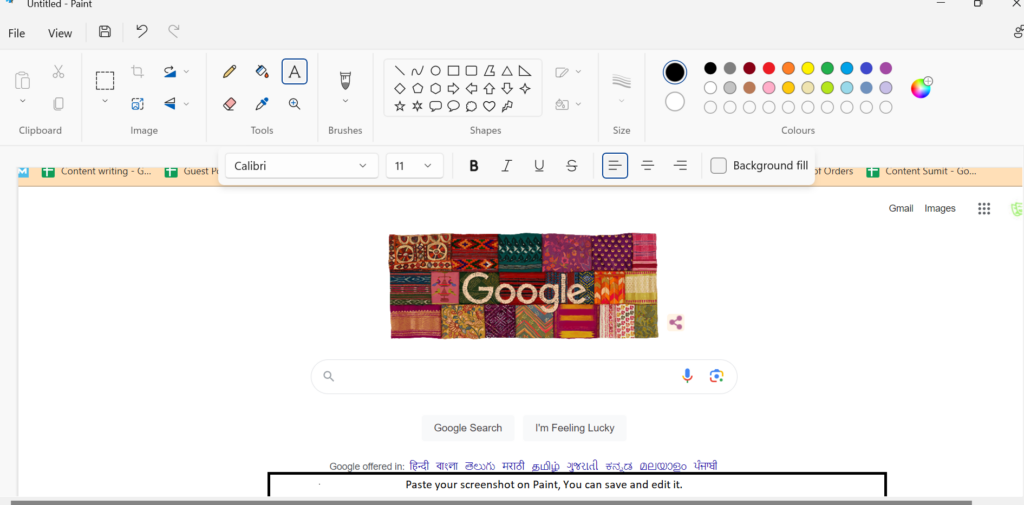
- Launch an application such as Paint or Word, and then paste the screenshot into it. At this point, you can make any necessary edits to the screenshot or designate an appropriate saving location.
It’s worth noting that the screenshot will already have a duplicate in your clipboard. To permanently save the file, simply paste the screenshot into any software that facilitates image insertion, such as Microsoft Word or Paint.
The Windows key + Print Screen
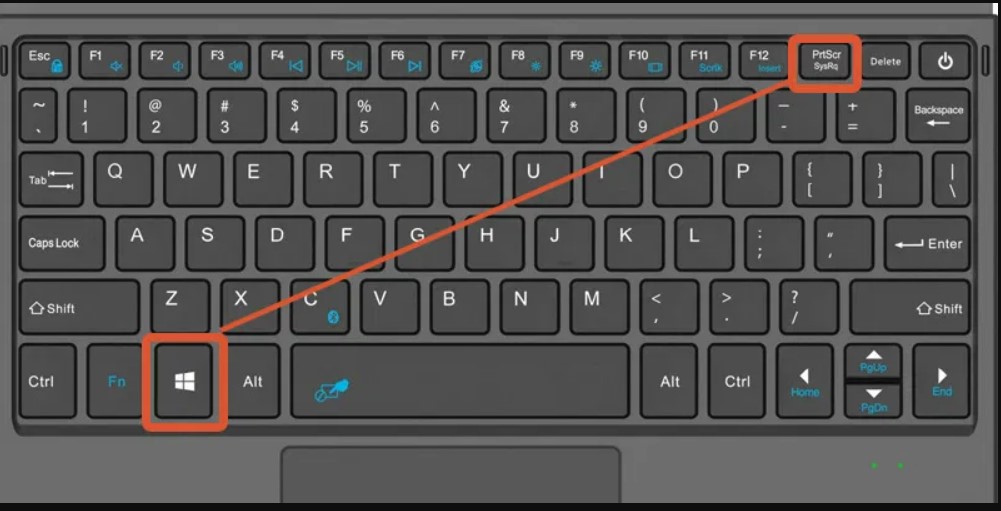
Image Credit- winsorconsulting.com
To rapidly take a screenshot on Windows 10 or Windows 11 and quickly store it in the Screenshots folder, simultaneously press the Windows key and the PrtScn key. This action will result in your screen dimming momentarily, while a screenshot of your complete display will automatically appear within the relevant folder.
Alt + Print Screen
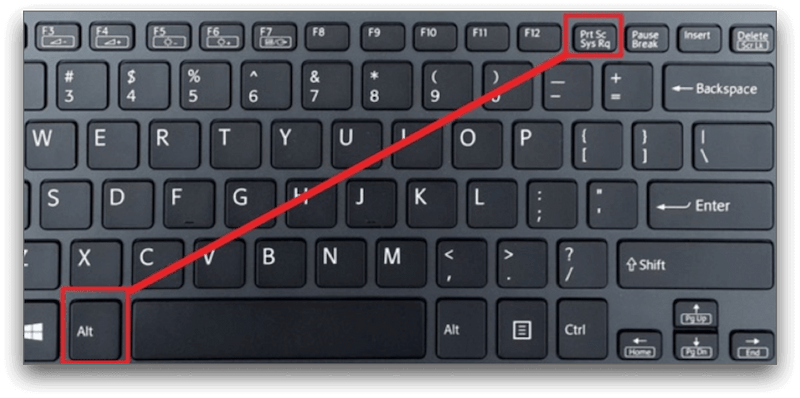
Image Credit- awesomescreenshot.com
If you wish to exclusively capture the currently active window you are using, simply press Alt + PrtScn. To retain the screenshot as a file, you’ll need to paste it into another software program for saving.
With The Snip & Sketch tool in Windows 10
For those seeking to personalize, annotate, or share their screen captures, Windows 10’s Snip & Sketch offers an excellent solution. To activate Snip & Sketch, simply employ the keyboard shortcut Windows Key + Shift + S. Note that this will cause your screen to dim slightly, and a compact menu will emerge at the screen’s top.

Image Credit- typepad.com
This menu presents various capturing choices, including rectangular, free-form, window, or full-screen captures. With these Snip & Sketch options, you can also choose the method that best suits your screenshot requirements.
After capturing the screenshot, it will be placed into your clipboard, and a preview notification will emerge in the bottom-right corner of your screen. By clicking on this preview notification, you can access the Snip & Sketch app. This will enable you to save, share, or enhance the screenshot using the assortment of drawing tools provided.
The Snipping Tool in Windows 11
Despite the presence of the Snipping Tool in Windows 10, it’s typically not the primary screenshot tool of choice. However, in Windows 11, the Snipping Tool has undergone significant improvements, making it the optimal method for capturing customized screenshots.
To launch the Snipping Tool in Windows 11, you have the option to either search for it or utilize the keyboard shortcut Windows Key + Shift + S. Similar to the Snip & Sketch process, your screen will dim slightly, revealing a toolbar of screenshot alternatives at the screen’s upper section. This toolbar empowers you to capture a rectangular, freeform, full-window, or full-screen screenshot, tailored to your preferences.
After capturing your screenshot, it will be duplicated in your clipboard, facilitating immediate sharing. Simultaneously, it will also be automatically stored within the Screenshots folder. By clicking on the emerging preview located in the lower-right corner of your screen, you’ll gain the ability to both save and make edits to the screenshot.
Using The Game Bar
The Game Bar serves as an overlay accessible across numerous Windows applications and games, allowing you to capture screenshots and record videos. Follow these instructions to activate and utilize it:
- Use Windows Key + G.
- Within the overlay menu, locate and click the Capture button, identifiable as a camera icon, positioned in the top menu. This will bring up the Capture menu.
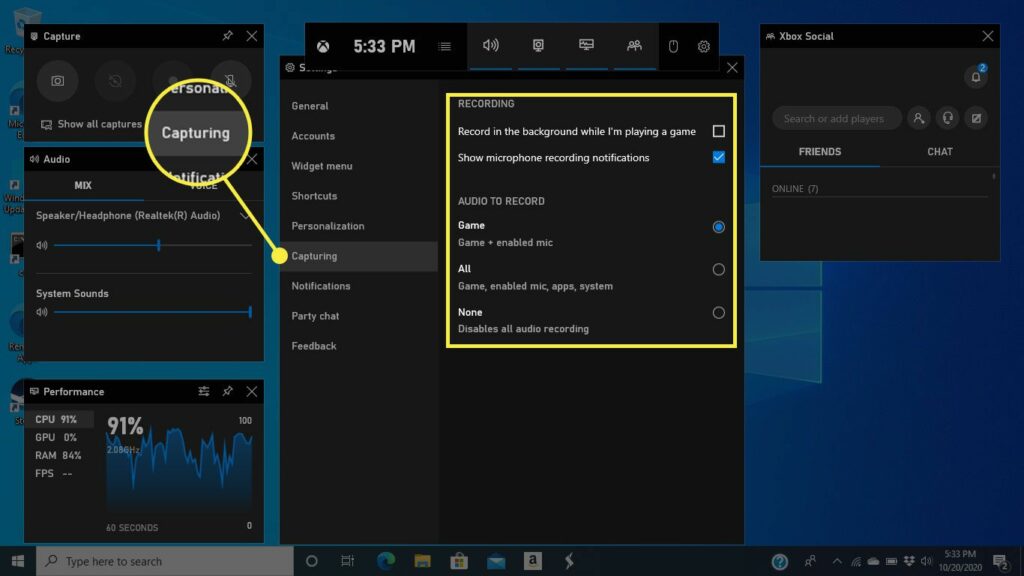
Image credit- lifewire.com
- Within the Capture menu, select the camera icon to initiate a screenshot capture. Alternatively, you can record a video clip by pressing the record button, with the option to incorporate audio by clicking the microphone icon.
The Game Bar captures screenshots and video clips, which are stored in PNG and MP4 formats. You can locate these files within the Videos > Captures folder in File Explorer. Alternatively, you can access them via the Game Bar’s Gallery. To do this, click on “Show my captures” and then select “See my captures” located below the screenshot and recording buttons within the Capture menu.
Power + Volume Up
When using a Microsoft Surface device and aiming to capture a screenshot on Windows 10, simultaneously press the Power Button and the Volume Up Button. This will result in the screen dimming, and your screenshot will automatically be stored in the Pictures > Screenshots folder. In the case of a Surface 3 or earlier models, you’ll need to press the Windows Logo and the Volume Down Button to capture a screenshot.
Conclusion: How to Take a Screenshot on Windows 10 and Windows 11
In the ever-evolving landscape of Windows operating systems, mastering how to screenshot on PC is a valuable skill in 2023. With a myriad of built-in tools and convenient keyboard shortcuts, capturing your screen has never been more accessible. Whether it’s the classic Print Screen key, the enhanced capabilities of Snip & Sketch, or the versatile Game Bar, Windows 10 and Windows 11 provide several ways to take a screenshot on PC.
From full-screen captures to customized selections, the ability to immortalize your digital experiences is at your fingertips. As technology continues to advance, staying acquainted with these screenshot techniques empowers you to effortlessly save, share, and enhance your visual content. So, as you navigate the digital realm, remember the tools at your disposal for seizing those moments worth preserving.
FAQ: How to Take a Screenshot on PC
1. What’s the difference between Snip & Sketch and the Snipping Tool?
While both tools offer advanced screenshot capabilities, Snip & Sketch is more versatile in Windows 10 and Windows 11. It provides additional features like annotating and sharing, making it suitable for various needs.
2. How do I access screenshots taken using the Game Bar?
Screenshots and video clips captured with the Game Bar are stored in PNG and MP4 formats. You can find them in the Videos > Captures folder in File Explorer, or access them through the Game Bar’s Gallery.
3. What’s the procedure for taking screenshots on a Microsoft Surface device?
For most Microsoft Surface devices, press the “Power Button + Volume Up Button” to capture a screenshot. On Surface 3 or earlier models, use the “Windows Logo + Volume Down Button.”
4. What’s the benefit of learning these Windows screenshot techniques in 2023?
In a digital age where visual communication is vital, knowing how to efficiently capture and share screenshots enables you to convey information accurately, troubleshoot issues, and collaborate effectively across various platforms.