

Before using an AI-generated 3D model in production, check its shape, topology, textures, materials, scale, orientation, editability, performance, and destination-specific requirements.
Generating a 3D model with AI can take far less time than building the same starting point manually. A short description or reference image may be enough to produce a character, prop, product concept, decorative object, or environment asset that looks convincing in a preview.
The important question comes next.
Is the model actually ready for the project?
A good-looking result is not necessarily a game-ready asset, a printable model, an accurate product visual, or an efficient object for a website. Each destination has different technical requirements, and those requirements matter more than how impressive the first preview looks.
Before using an AI-generated 3D model in production, creators should evaluate the asset in the context where it will eventually be used.
Start With the Intended Use
The same 3D model can be acceptable for one project and unsuitable for another.
A background prop in a game may only need a recognizable silhouette and reasonable performance. A character that appears close to the camera needs much stronger topology, textures, and animation preparation.
A product concept used during an internal presentation does not necessarily need exact manufacturing dimensions. A model used to explain a physical product to customers requires much greater visual accuracy.
A decorative object intended for a website may need aggressive optimization, while a model prepared for 3D printing needs geometry that behaves correctly in a slicer.
This is why “Is this model good?” is usually the wrong question.
A better question is:
Is this model good enough for what I need it to do?
Defining the destination first makes every later decision easier.
Do Not Judge the Model Only by the Preview
AI-generated models are usually shown under favorable viewing conditions.
The lighting is controlled. The camera is positioned well. The background is simple, and the object is often displayed at a scale where the strongest visual details are easy to notice.
Real projects are less forgiving.
A game prop may look excellent in a standalone viewer but become visually confusing from the actual gameplay camera. A product model may appear realistic until it is compared directly with approved photography. Small pieces that look attractive on screen may be too thin for physical printing.
The first useful test is therefore to move beyond the generator preview.
Rotate the object from every direction. View the underside and back. Zoom in on joints and narrow areas. Compare the proportions with the original reference. If the model will be used inside another application, import it as early as possible.
The sooner the model reaches its real environment, the sooner its limitations become visible.
Check the Overall Shape Before Small Details
Creators often notice texture quality first because materials strongly affect the visual impression of a model.
But the larger form matters more.
Before spending time improving materials, check whether the silhouette, proportions, major openings, and structural relationships are correct.
For a character, ask whether the limbs, torso, head, and equipment have believable proportions.
For a product, check whether the height, width, depth, and major components match the intended design.
For an environment prop, make sure the shape is readable at the distance where players will actually see it.
Minor surface imperfections can often be corrected later. A fundamentally wrong proportion is more expensive because it may affect every later stage.
Inspect the Geometry Instead of Assuming It Is Clean
Rendered appearance and mesh quality are different things.
A model can look smooth while containing far more geometry than the project needs. It can also contain awkward surfaces, intersections, thin sections, or topology that becomes difficult to edit.
Open the model in the software you normally use and inspect the mesh directly.
The required standard depends heavily on the asset.
A static background object may tolerate less elegant topology if it performs well and never deforms. A character intended for rigging needs a structure that can support joints and animation. A model intended for further sculpting or editing should also be reasonably manageable.
Do not optimize simply because a triangle count looks high, either.
The relevant question is whether the geometry is appropriate for the model’s visual importance, camera distance, platform, and editing requirements.
A desktop game, mobile game, browser experience, and offline render may all justify very different asset budgets.
Treat AI Generation as the Starting Point
The greatest value of AI 3D generation is often that it removes the empty-scene problem.
Instead of beginning with nothing, creators can start with an interpreted version of an idea and decide whether that direction deserves further work.
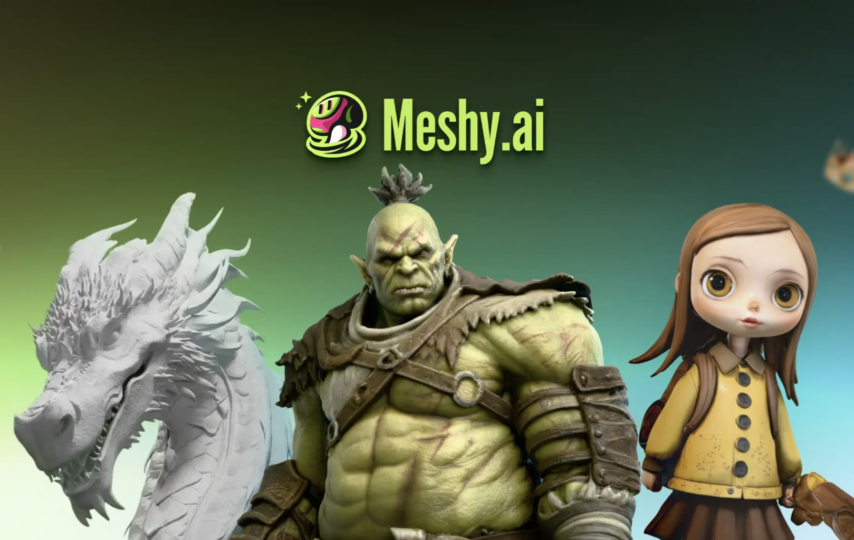
Platforms such as Meshy AI allow users to generate 3D assets from text descriptions or reference images and continue working with the resulting model through a broader AI-assisted 3D workflow.
That can be especially useful during prototyping.
A developer can quickly create a prop to test inside a level. A designer can turn a rough visual direction into a three-dimensional concept. A creator preparing a printable object can explore several forms before choosing one for refinement.
The generated model should still be treated as an asset entering a workflow rather than as proof that the workflow has finished.
That mindset avoids many of the problems caused by expecting the first result to solve every production requirement automatically.
Look at Textures at the Size They Will Actually Be Seen
High-resolution textures can make a model impressive in close-up screenshots, but resolution has a cost.
Larger texture maps consume more storage, memory, and download bandwidth. If the asset will only occupy a small part of the screen, much of that information may never be visible.
Evaluate textures under realistic conditions.
For a game asset, view the model from the expected gameplay distance.
For a Web 3D object, test it at the actual size of the embedded viewer.
For a product visual, zoom only as far as customers are expected to inspect the item.
Then determine whether additional resolution is producing meaningful visual improvement.
Material accuracy also matters.
Metal, plastic, fabric, wood, leather, and painted surfaces should react to lighting in a believable way. When the model represents a real product, attractive materials should never come at the expense of accurate appearance.
Check Scale and Orientation Early
A technically valid model can still create unnecessary work if the scale is wrong.
This becomes particularly obvious when assets move between tools.
A chair might arrive far larger than a room. A game prop may have its pivot in an inconvenient location. A model may face the wrong axis when imported into an engine. A 3D-printing object might be interpreted in the wrong unit.
These problems are normally easy to fix, but repeated manual corrections become frustrating when a project contains many generated assets.
Establish a consistent standard.
Choose the measurement units used by the project, define the expected forward direction, determine where pivots belong, and keep naming conventions consistent.
Small pipeline rules matter more as AI makes it easier to create larger numbers of assets.
Decide Whether the Model Needs Retopology
Not every generated model needs to be rebuilt.
Retopology makes the most sense when the existing mesh does not match the next stage of production.
Characters that need to deform during animation are an obvious example. Clean edge flow can significantly improve rigging and deformation.
Assets that will undergo substantial manual editing may also benefit from more organized geometry.
On the other hand, rebuilding a static object that already works correctly may simply add unnecessary production time.
The decision should be based on what happens next, not on the assumption that every model must satisfy the same topology standard.
A production pipeline becomes more efficient when teams spend cleanup time where cleanup produces a visible or technical benefit.
Test the Asset on the Target Hardware
Performance should not be estimated from the workstation used to create the model.
A developer working on a powerful PC may have no problem displaying an asset that performs poorly on the hardware used by the intended audience.
This is particularly important for mobile games, browser-based 3D, VR experiences, and applications expected to run on a wide range of consumer devices.
Test the complete scene rather than one object in isolation.
A single model may be inexpensive. Hundreds of instances of similarly complex assets may not be.
Textures, materials, shaders, lighting, animation, and the number of visible objects all contribute to the final cost.
Optimization becomes meaningful only when it is measured in context.
3D Printing Has a Different Set of Problems
A model prepared for physical printing needs checks that may be irrelevant to a digital scene.
Visual appearance alone is not enough.
Very thin components can break. Small gaps may disappear. Unsupported forms can require additional structures during printing. Intersections or open geometry may cause problems during slicing.
Scale is also critical.
A detail that looks substantial on a monitor can become nearly invisible when the complete model is printed at miniature size.
Before printing, inspect the model inside the intended slicer and evaluate it at the actual physical dimensions.
If the model was generated primarily for visual use, some structural changes may be necessary before it becomes practical to manufacture.
Product Visuals Need Accuracy, Not Just Realism
Product visualization creates another important distinction.
A model can look realistic without accurately representing the product.
If an AI system infers a hidden surface incorrectly or changes a curve slightly, viewers may never notice when looking at a generic concept. The same change becomes important when the model is being used to represent something customers can purchase.
Compare the model with approved reference photography and specifications.
Check distinctive curves, buttons, ports, seams, proportions, colors, finishes, and other details customers may use to evaluate the item.
If the asset is still conceptual, make that clear rather than presenting it as an exact digital copy.
Good product visualization is not about producing the most attractive possible model. It is about communicating the product accurately.
Know When Manual Work Is Worth the Time
AI makes creating the first version much cheaper.
That does not mean every later correction should also be automated.
Sometimes adjusting a generated model manually is faster than regenerating it repeatedly.
If the general shape is correct but one component is slightly wrong, editing that component may be the efficient choice. If the entire visual direction is incorrect, generating a new version may make more sense.
The skill is knowing when to iterate through AI and when to switch to traditional tools.
This hybrid approach is likely to become increasingly normal.
AI handles fast exploration and creates starting assets. Traditional 3D tools provide precise control when the project requires it.
A Simple Final Review Before Production
Before approving an AI-generated model, evaluate it from the perspective of the final project.
Does the silhouette work at the intended viewing distance?
Are the proportions correct?
Is the geometry appropriate for the next stage?
Do the textures provide enough detail without being unnecessarily heavy?
Are materials believable and, where necessary, accurate?
Does the model use the correct scale and orientation?
Can it be edited, rigged, optimized, displayed, or printed as required?
Most importantly, has it been tested in the environment where it will actually be used?
If those questions have clear answers, the asset is much closer to being useful than a model that simply looks impressive in a preview.
FAQs About AI-generated 3D models
Are AI-generated 3D models ready to use immediately?
Sometimes they can be used directly for early prototypes or simple visual purposes, but production projects should still inspect geometry, textures, scale, materials, and project-specific requirements before approval.
Do AI-generated 3D models always need retopology?
No. Retopology is most useful when the existing geometry does not support the next task, such as character animation, extensive editing, or a strict real-time performance budget. A static asset that already performs correctly may not need to be rebuilt.
Can AI-generated 3D models be used in games?
Yes, but they should be tested inside the target engine and on appropriate hardware. Polygon count, textures, materials, collision, scale, animation requirements, and scene-level performance may all need review.
Can AI-generated 3D models be used for 3D printing?
They can, but visual correctness does not guarantee printability. Creators should check wall thickness, small details, intersections, open geometry, supports, and real-world scale inside the intended slicing software.
Is AI 3D better for concepts or final assets?
It is particularly valuable during concept development and rapid iteration because it lets creators test ideas quickly. Some generated assets may also progress into final production, but the amount of cleanup depends on the project and the technical standard required.
The Final Destination Defines the Quality Standard
An AI-generated model is production-ready only when it meets the technical and visual requirements of its final destination. A game asset, e-commerce product visual, Web 3D object, animated character, and printable miniature all demand different standards, so creators should judge geometry, textures, scale, performance, editability, and cleanup needs in that context. AI can accelerate the starting point, but knowing where the asset is going is what determines which details matter, where manual refinement is justified, and when the model is genuinely ready to move forward.