Slider Revolution
Slider Revolution plugin is a premium slider available as a jQuery plugin, Joomla plugin and WordPress plugin. It has gained tremendous popularity in the WordPress community due to its wide variety of functions and simple to use. Web Development is a premium quality free WordPress theme developed mainly for wordpress development company.
This guide is going to cover the main functions and features of the Slider Revolution WordPress Plugin and how easy it is to make your own sliders from scratch.
Slider Revolution: Why This WordPress Plugin is So Great
There are a lot of wonderful features built in to Slider Revolution to produce creating custom sliders for the site easy.
Responsive Layouts
The plugin is responsive ready and contains multiple slider layout choices to make your life simpler. First select your slider type: carousel slider, hero scene (single slide) or a standard slider. Then choose a layout: auto, full-width or full-screen.
The auto layout option permits you to set your slider size using exact pixels, together with additional choices to set the slider sizes in different screen width. When you leave this choice on it’s default setting it’ll stretch your slider to the container width according to your WordPress theme.
The full-width design is just what it sounds like – The full width slider option that’ll full stretch across from left to the right. You will still have to specify the height of your slider.
The very unique layout option is full screen. With this method you are able to make amazing sliders that literally fills your whole screen, no matter the size of your device or browser (you may use this to add full-screen sliders with videos for a lot more impact).
Multiple Content Sources
Want to make a slider for your articles? Or for your WooCommerce products? Not a problem – choose from eleven various content sources when creating your slider. As of making the post, Slider Revolution supports content based on particular posts, blog posts, the current page/post, WooCommerce, Twitter, Facebook, YouTube or the default slider.
Easy Options
Slider Revolution plugin makes it easy for your to build custom sliders by adding in options for about everything. Choose the slide delay, custom fonts, add parallax backgrounds, navigation arrows, slider location and more, all using drop-down menus in the plugin. And on top of that you can edit just about everything and even save your presets to make reusing slide transitions, font styles, layer animations and more.
Media Support
Add links, text, videos and images with some clicks of your mouse. This provides you the ability to make information rich slides that your clients and readers will be able to identify with. Plus all of these types is added as its layer with unique animations, styles and timing that you set using Slider Revolution’s super options.
Slider Revolution Installation
First you will need to receive a copy of the Slider Revolution WordPress Plugin. There are some various procedures to setup the plugin depending on when you bought your copy of the plugin or if it had been included along with your premium theme.
1. Install Your Copy of Slider Revolution

Install Slider revolution
If you bought your copy of Slider Revolution from CodeCanyon log in your Envato account and go into your downloads (you are able to get to the particular page by hovering on your own username). Then locate the copy of Slider Revolution and then choose the download for “Installable WordPress file only.”
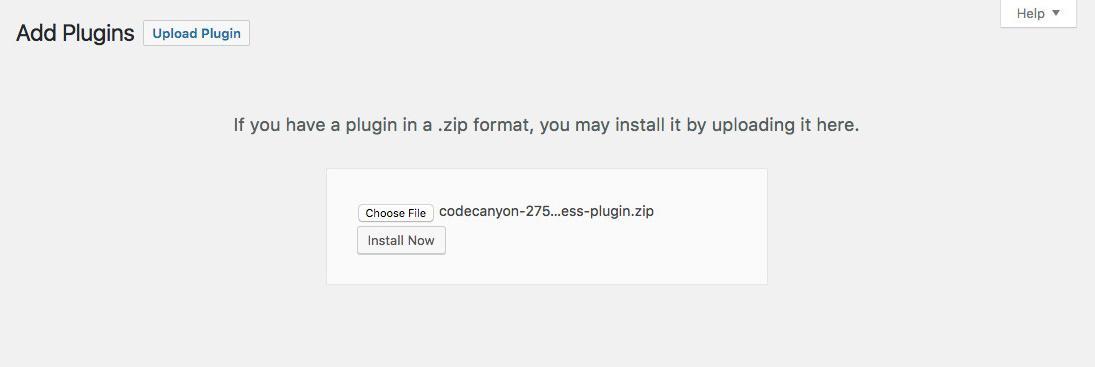
Add Plugins
After that, log into your WordPress website and navigate into Plugins > Add New and go to the “Upload Plugin” button at the top left of the display screen.
From here, use “Choose File” button to choose the plug-in file you downloaded from CodeCanyon, and then click on the “Install Now” button. Then, activate the plugin and now you are ready to begin creating sliders!
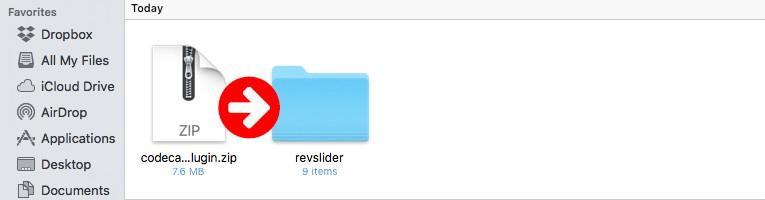
Revslider
Note: You can also install plugin through FTP by logging into the server and also uploading the extracted plugin to your own folder situated at wp-content/plugins.
2. Install and setup Slider Revolution Included with a Premium Theme
Many of the premium themes include copies of top premium plugins with the theme download. If this is the way you wish to install your copy of Slider Revolution then you have to reference your theme’s documentation. But most programmers do their very best to create this process simple.

Dashboard of Slider
For example, in case you are using the Total WordPress theme you need to observe an onscreen prompt which recommends you install Slider Revolution (as well as other plugins included with the theme). Click on the URL to start installing and then activate the plugin.

Demo Slider Revolution
Total includes a customized option in the demo importer to install and activate the Slider Revolution when importing sample information. In case Slider Revolution has been used to make the demo you are importing you need to be prompted to install the plug-in as seen above.

Import Slider
Then, just be sure that the option for “Import Sliders” is chosen, and also the theme will automatically import custom sliders from the demo.
Slider Revolution Guide
When you have installed the plugin, then it should include a menu item to your WordPress dashboard. Click on this to be taken to the Slider Revolution slider management page.

Slider Revolution
From here you can edit or create sliders, activate your license in case you bought your copy of the plug-in (if the slider has been included along with your theme you may ignore this section) and then see if your copy of this plug-in is up to date.
Slider Revolution Global Settings
Just Before you start building we recommend visiting the Global Settings selection (which is a submenu item underneath Slider Revolution).

Plugin Permission
There are lots of essential options here for default grid settings (which are implements when constructing new sliders), custom font loading URL, database creation for the plug-in and much more. However, there are 2 options we recommend you tweak.
The very first option you should think about editing is View Plugin Permission which you can utilize to restrict plug-in access to admins only. This is a simple way to ensure you, your web designer or other admins will be the only ones making sliders on your website (especially useful if you might have guest writes on your site).
The second choice you might like to disable is the Enable Notifications choice. If you are having a copy of Slider Revolution which has been included with a premium theme you may possibly be seeing notices “enter your license” or “upgrade”when there is no need. Only disable this choice to hide notices.
Now you can begin creating your sliders! You have three choices – Start from scratch, snag a free export file from Slider Revolution “usage examples” or import sample sliders included with the theme.
Import a Sample Slider

Sample Slider
If you select to import a sample slider out of Slider Revolution’s usage examples, first download slider file from their website, then navigate back to the WordPress then just click on the Import Slider option. From right here, browse for the sample file you’ve downloaded and then click on the Upload. This ought to include the sample slider and all of it’s settings, therefore you are able to use it as a base for a slider that is new.
Create A New Slider
If you are creating a slider from scratch, then, click on the New Slider option. Now begin from the top.

Sample Slider
Choose a content source: select how you would want to include content to your slider. There are 11 content material sources to select from, however for the most part you’ll need to pick the default option.

Slider shortcode
Add a slider title & shortcode: Choose a name for your own slider that’ll allow you to remember what it contains or exactly what page you are using it on. This is where you will find the simple shortcode for the slider to insert it into pages and posts.

Slider Type
Choose a slider type: Select a slider type, and choose a preset to load presets included in the plugin.

Slider layout
Select a slide design: Choose your slider layout and grid. You are able to set customized grid sizes based on the size of the display screen, though full screen will fill your whole browser screen. No matter whichever choice you choose, you will have to add a Grid height and width which will choose the size of your layer container.
Next scroll back up to the top of the screen to start modifying the General settings for the slider.
Slider Settings
On the right you will see a lots of slider options.

Edit Slider
Once you have finished creating your choices click on the green file on top of the display screen to save the changes. Then, click the blue pencil to begin modifying slides!
Add or Edit Slides

Slider Homepage
Now you can begin adding your slides. There are 2 or 3 slide options based on if you are starting from scratch or using a sample slider: Global/Static Layers, some already built slides and Add Slide.
Global/Static Layers is going to be seen as an overlay on top of any slides you make. This is really a good way to add a watermark or logo, add a “Buy Now” button for the product or may be a link to subscribe to your newsletter.
Select an existing slide to create changes to the slide you have previously imported or created as a part of a sample slider. This is one of the simplest methods to begin with Slider Revolution if you are new to the plug-in, as their sample sliders show how to correctly use various plug-in function to build impressive sliders.
Click on the Add Slide to start building a slide from scratch.
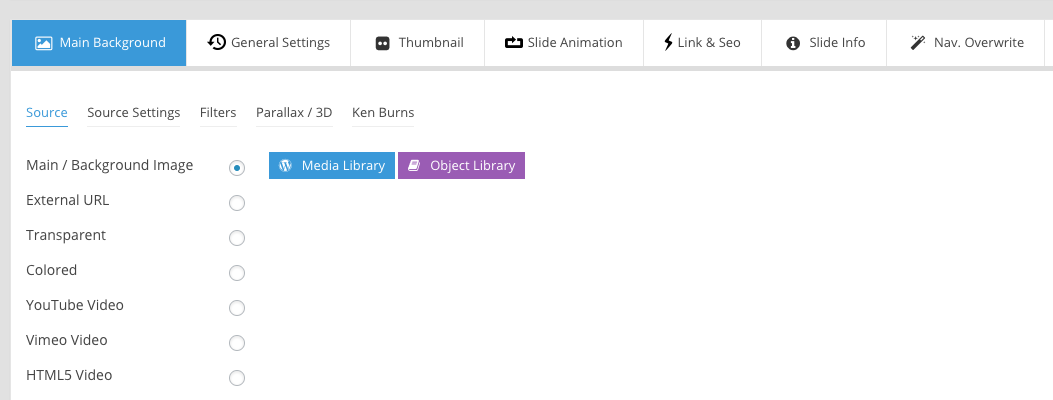
Slider Background
To begin with, use the Main Background options to choose your slide background: picture, transparent, external URL, solid color or video. Then use choices for media source settings and filters if you would love to further customize the slide.

Slider Settings
Next proceed to the General Settings. This is the place where you are able to set a slide delay if you do not need your slider to being animating as soon as it loads, edit slide looping or add an expiry date. Another helpful function on this particular tab is the ability to place your Slide State to unpublished – this method you are able to continue to edit your slide and then preview it at the backend of your site without the new slide being visible to your site traffic.
If you’re using a thumbnail navigation for the slider, the Thumbnail tab provides choices to choose a custom slide picture and dimensions. However, if you have chosen not to use this specific navigation style you are able to skip this tab.

Slider Animation
With that completed you can switchover into the Slide Animation tab to personalize the slider transition animation. There are more than 80+ animations to pick from plus options for rotation, duration as well as easing.
Revolution Slider offers choices for Link & SEO settings option, Slide Info and Navigation Overwrite to include customized navigation arrows, thumbnails or bullets specifically to your slide.
Now is a good time to click that green file icon at the top of the display screen to save your settings before including layers and styles to your slide.
Add Slide Layers

Slider revolution Layout
When editing or adding slides, Slider Revolution is packed with choices, and they keep coming. You can select from 8 different Add Layer sections.
Click on the blue “Add Layer” button to begin, then use the choices to really customize or layer.
Layer Options
When you look just north of the major slider preview section that you should observe a white bar with loads of choices you may use to customize and edit your layers when you add them.

Slider Style
Use the Style choices to edit your colors, fonts and layer location. This consists of everything from the custom Google font, line height, font size, layer background, text color, and more.

Slider Animation
The Animation tab is just as you’d assume – it holds choice for customizing and adding the entry and exit animations for layer. Choose a preset animation template, then add an easing and edit the animation duration time.

Slider Loop
Loop settings options are simple: either leave disabled so that your layer only loads with the animate you chosen, or enable looping by picking type. Select from pendulum, sideloop, rotate, pulse and wave to provide your layer a constant, looping animation.

Slider visibility
Mobile configurations are found under Visibility. From this you are able to specify if a layer needs to be visible on specific devices, hidden under a set width or simply seem on hover.

Slider Behavior
Behavior contains a couple of useful toggles to personalise your layer settings. The first is that a setting to allow layer auto-responsiveness and child element responsiveness. By default slide layers will soon shrink while the web browser window shrinks, disable those options to keep layer sizing. You are also able to edit the layer alignment and responsive offset from here.
Use the Actions tab in order to add custom layer options on click, mouse leave or mouse enter. Actions include toggle, scroll, pause, media play, enter fullscreen, mute and more.

Slider Attributes
For advanced developers or users, the Attributes part can be used to add your ID, wrappers and classes to target with custom code.

Slider Parallax
And finally, the Parallax/3D gives a dropdown selector to pick the “level” of parallax effect you would love to add to a layer. The greater the percentage, the higher your layer is going to move.
Layer Frame Times
Moving, beneath your own slider preview you need to see a timetable. From here you are able to edit the delay for if your layers will soon animate on your own slide. You may also observe a visual timetable showing the layer timing in comparison to the total time length of the slide. The blocked section is the layer animation time, and also the lighter colored bar is the whole length of time that your layer will soon be visible.

Slider Layer
To personalize the total duration for your own slide, just click and drag to the blue tag at the very top right of the table.
When you have added number of layers it is also possible to use this section to reorganize your layers by editing the position, the entrance time period, or by dragging and dropping the layers right into order. And you can take advantage of this part to play your slide to preview your time as you create edits.
Save Your Slide
The very important step is to save your slide. Ensure that you Save or Update the slide after making any kind of changes in this wordpress web development. If you navigate away from the slide you can lose all your hard work. So make sure to save!
Once saving, you are able to move on and work on other sliders and slides.
Using Your Slider
To add the amazing slider to any page or post, use the Slider Revolution short-code that you just built earlier. This short-code can be seen by clicking the Slider Revolution menu item into your dashboard. The short-code should based on the alias you gave the slider when you first built it.
Simply paste the short-code in your page or post content. Or when the theme supports extra slider locations you are able to add the short-code there too. Number of WordPress themes also include unique modules for the slider.